Quck Startup Guide
How to Setup an Account and Build a Rule
To get familiar with the program and quickly learn how to start working with G-Lock Email Processor, follow the steps in our startup guide below.
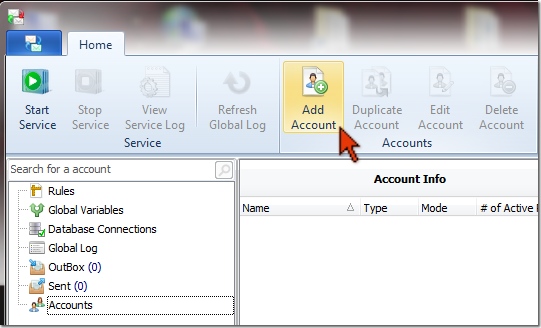
Step 1. Creating Email Server Account.
To start, you need to create an account the program will retrieve incoming emails from.
Click on the "Add Account" button on the toolbar under the Home menu.
Type the account name, set the time interval for the account check and select the account type.
Enter your IMAP Mail Server Settings.
If your incoming mail server does not support IMAP, select POP3 in the Account Type menu and enter your POP3 Mail Server Settings.
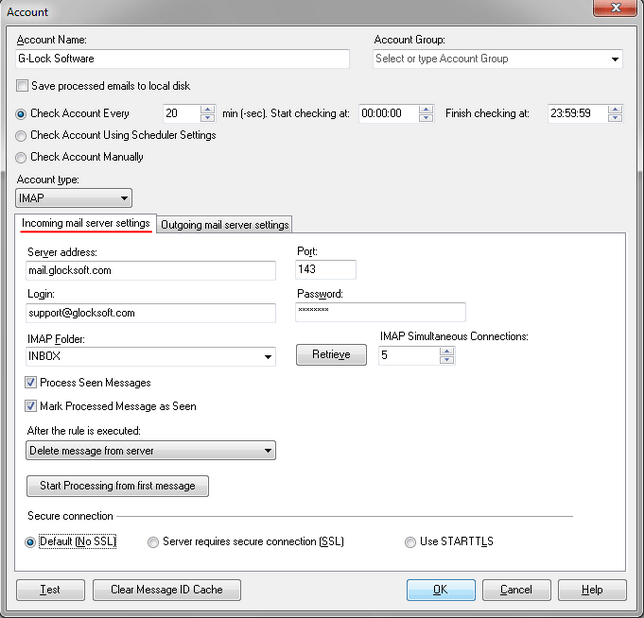
Then enter your Outgoing Mail Server Settings if you are going to use the Send Email component in the rule to send a reply message to the recipient or forward the original message.
If you do not intend to send or forward the email, you can leave the Outgoing Mail Server Settings empty.
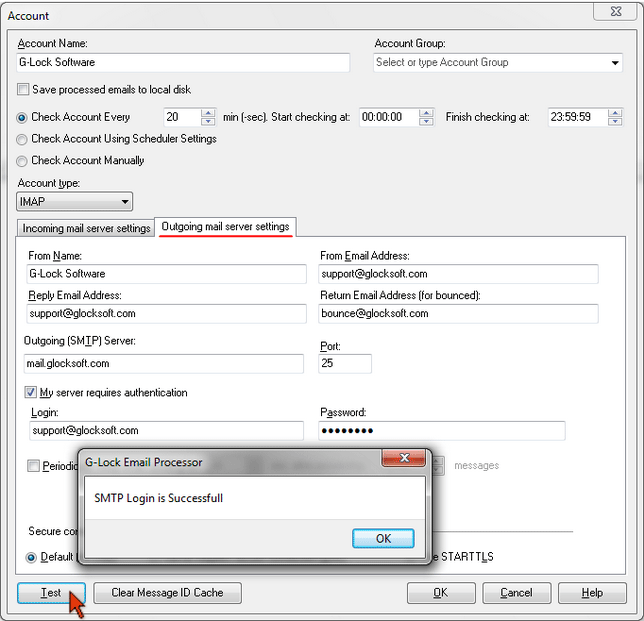
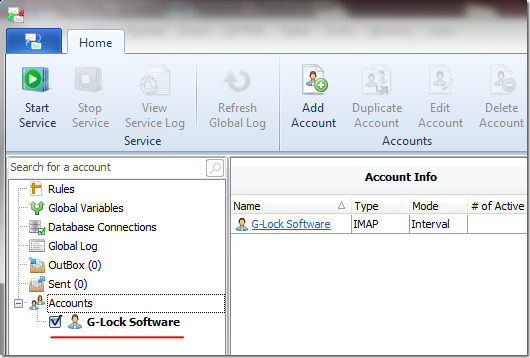
Click OK to save the account settings.
The account appears at the left side under Accounts.
Step 2. Creating Rule to Process Emails.
If your email client does not allow you save the message as the .eml file, do this:
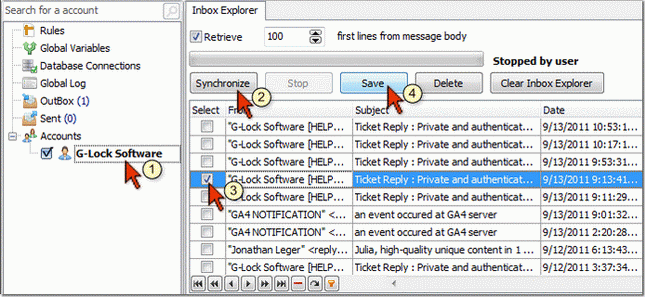
Click on the Account name at the left pane.
Click on Synchronize.
Wait until the Inbox Explorer retrieves your emails from the server. Or, you can stop the process using the Stop button after a certain number of emails are retrieved.
Check the box next to a message.
Click Save.
Then select a folder on the disk and click OK.
The message will be saved to the selected folder in the .eml format.
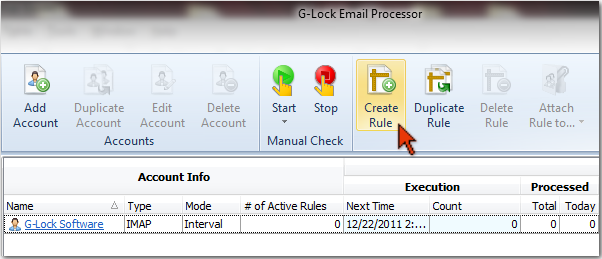
After you save the message that you will use for testing the rule, click on "Create Rule" under the Home menu.
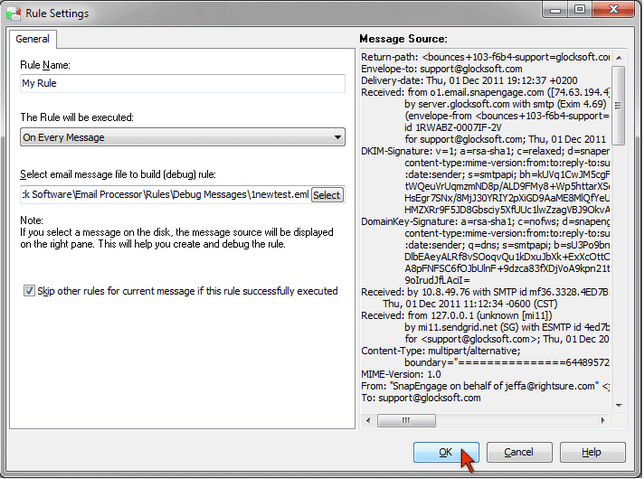
Type the rule name, for example, "My Rule".
Select "On every message" in "The Rule will be executed on" menu.
Click "Select" and select your .eml file you will use to test the rule on the disk.
Check the "Skip other rules for current message if this rule successfully executed" option.
Click OK.
Step 3. Adding Rule Components.
Now it's time to add the rule components (Message Filter, Field Extractor, Send Email etc.) to perform different actions on the messages.
We'll use the sample message below:
Subject: insurance type
Body:
insurancetype="Auto" firstName="julia" lastName="baker" address="212 apple pie lane" cityName="thatplace" state="MD" zipCode="21655" email="seosirena@gmail.com" phone="455767992"
We'll create a sample rule that filters incoming emails, captures the emails with "insurance type" in the Subject, extracts the first name and email address from the message body and sends a reply message to the recipient with the personalized Subject line (the recipient's first name will be merged into the Subject line).
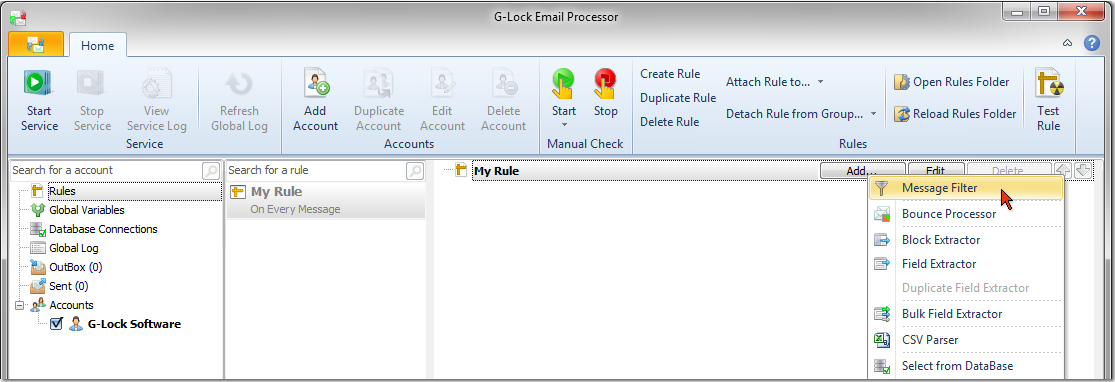
Click on Rules at the left pane and then click on the rule name "My Rule".
Click on the "Add" button next to the rule name.
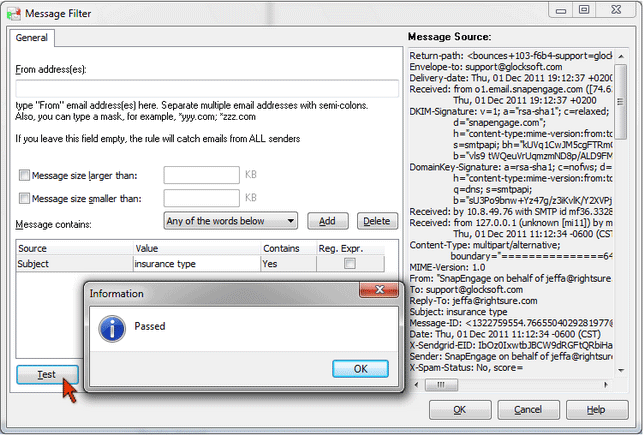
Select "Message Filter".
Click on the image to enlarge it
As we will filter the emails by the Subject, we leave the "From address(es)" field empty.
Select Subject in the Source.
Copy-paste insurance type into the Value.
Contains – Yes
Reg.Exp. (Regular Expression) – unchecked
Click Test.
The test passed because the Subject of our sample email contains the "insurance type" words.
Click OK to save the Message Filter.
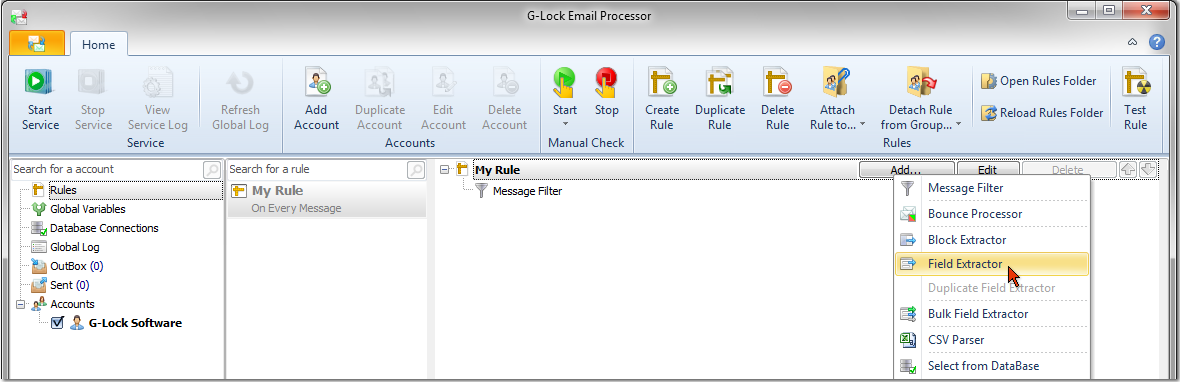
After the filter is added, we can add the Field Extractor component to extract the recipient's first name from the message body.
Click on the rule name, click "Add" and select "Field Extractor".
Click on the image to enlarge it
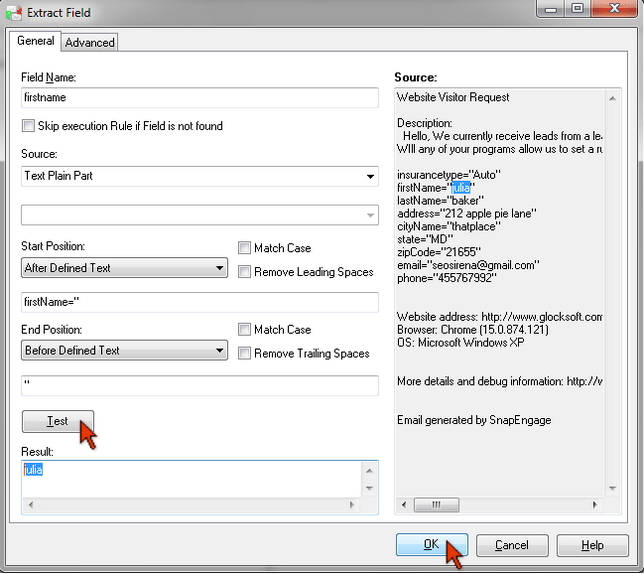
Type a field name, for example, firstname.
Select Source – Text Plain Part
Select Start Position – After Defined Text firstName="
Select End Position – Before Defined Text "
Click Test.
We see the first name in the Result screen. This means that the Field Extractor is setup correctly.
Click OK.
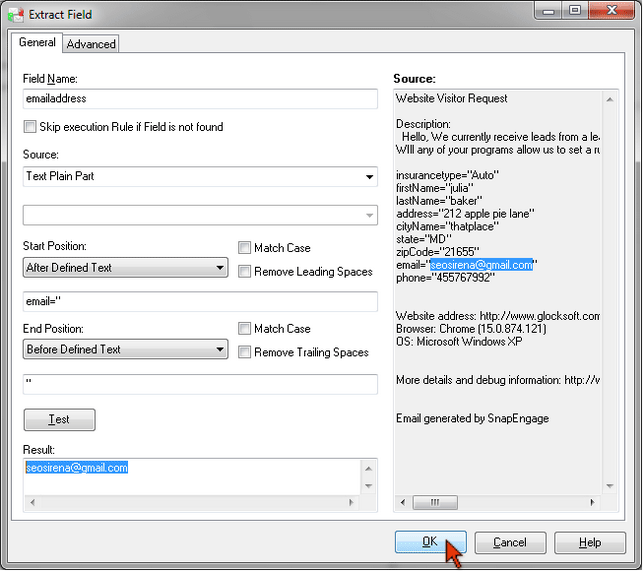
Now we need to add the Field Extractor again to extract the email address from the message.
Click on the rule name, then click on "Add" and select the "Field Extractor".
Again type a field name, for example, emailaddress.
Source – Text Plain Part
Start Position – After Defined Text email="
End Position – Before Defined Text "
Click Test.
You must see the email address in the Result screen.
Click OK.
After we added the Message Filter and Field Extractor, we can add the Send Email component.
Click on the rule name, then click on "Add" and select "Send Email".
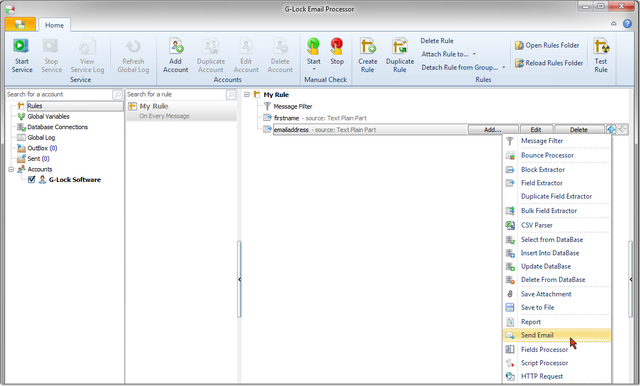
On the "Send Email" screen type a Component Name.
Click the right mouse button in the "Recipient Email" field, select "Insert Field" and then select emailaddress.
The field name will be inserted in this format [%emailaddress%].
During the rule execution, the field name will be replaced by the actual recipient’s email address extracted from the message.
Now click the right mouse button in the "Subject" field, select "Insert Field" and then select firstname.
You can insert the firstname variable into the "Recipient Name" field too.
The field name will be replaced by the recipient’s first name during the rule execution.
Write the message text and click OK.
Step 4. Testing the Rule.
After you build the rule, it's recommended that you test if it works as it should before you start processing messages.
Click on "Test Rule" button on the toolbar under the Home menu.
The log shows that our sample rule worked well.
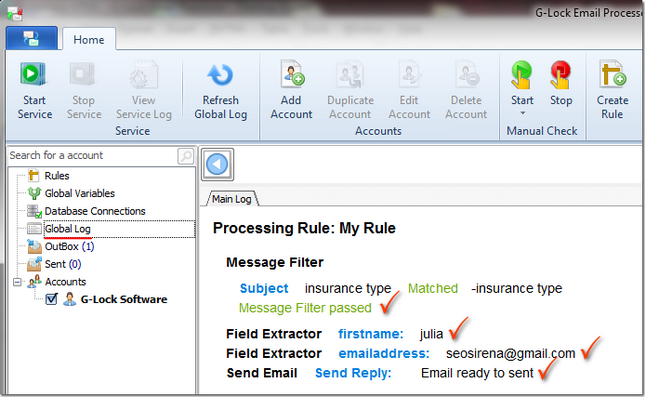
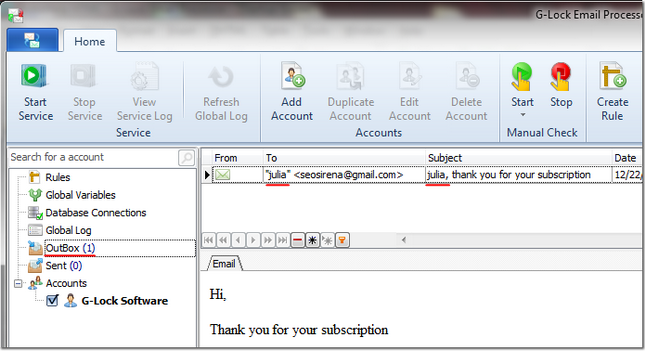
The message that will be sent to the recipient was moved to the Outbox.
The first name and email address were merged as we needed.
Note: in test mode the message is moved to the Outbox but not sent to the recipient.
If you see that something does not work as it should, correct the rule components.
Test your rule until you make sure it works correctly.
Step 5. Starting Service to Process Email Messages.
After test you can start the service to retrieve emails from the server and process them by the rule.
Click the right mouse button on the rule name, then click on "Attach Rule to…" and select the account name.

Click on the image to enlarge it
Check the boxes next to the rule and account at the left side of the program window.
Click on "Start Service" under the Home menu.
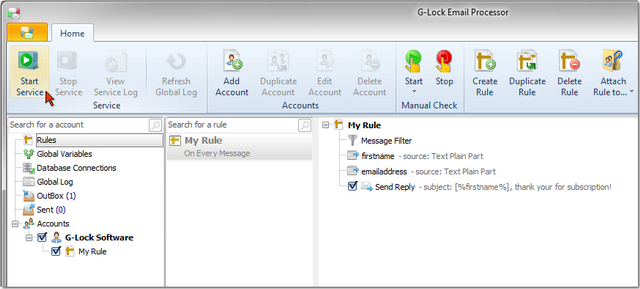
You will find a detailed log for each processed message in the Global Log.