How to Verify Emails Stored in G-Lock EasyMail v6 Address Book
…without Export-Import
This tutorial is for the Advanced Email Verifier and G-Lock EasyMail v6.xx.
Watch this video to learn how you can connect from the Advanced Email Verifier to the group in G-Lock EasyMail v6 address book and verify the email addresses without export-import. The verification results will be saved to G-Lock EasyMail v6 address book.
Step 1. Adding New Fields to the Group
Before you connect to G-Lock EasyMail address book and verify the emails, you must add a new field to the group in G-Lock EasyMail v6 address book, to which the Advanced Email Verifier (AEV) will write the verification result (good, bad, or unknown). You can also add a field to write the error description so you can understand why an email address was marked as bad or unknown.
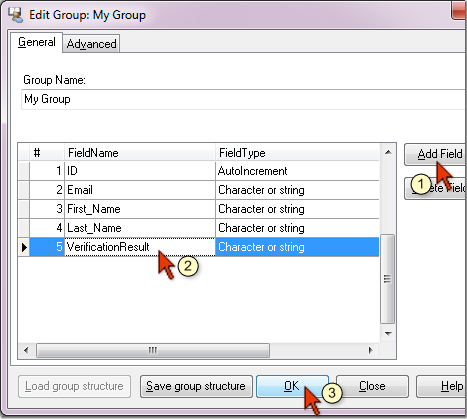
To add a new field:
Open G-Lock EasyMail v6 address book.
Click the Edit menu.
Select the group and click on the "Edit Group Structure" option.
Click on "Add Field".
Type VerificationResult as a new field name.
Select Character or String field type.
Click OK.
Now you are ready to connect to G-Lock EasyMail v6 address book from the AEV.
Step 2. Creating Link from AEV to the Group in G-Lock EasyMail v6 Address Book
Open Advanced Email Verifier.
Click on My Databases tab at the left pane.
Click on New under the Home menu.
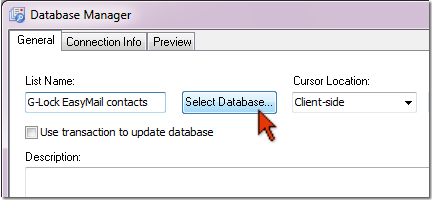
Type a link name in the Database Manager.
Click on Select Database button.
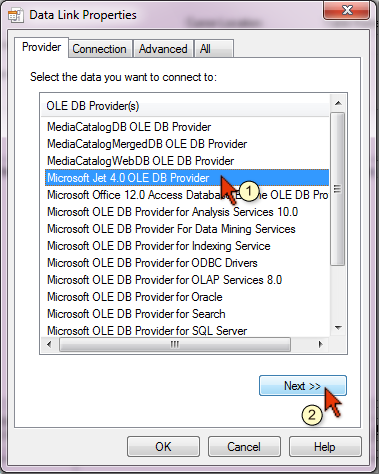
Select Microsoft Jet 4.0 OLE DB Provider and click Next.
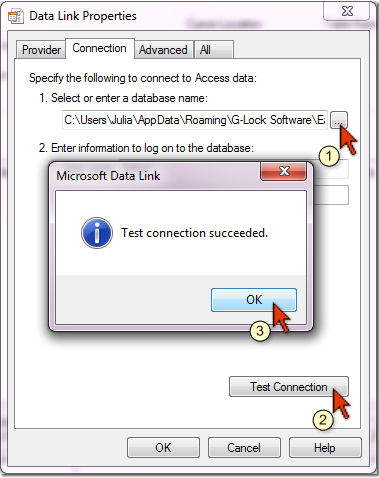
In the Connection tab select G-Lock EasyMail v6 database (EM50.mdb file) on the disk.
On Windows 2000 or XP, the path to the EM50.mdb file is
C:Documents and Settings[USER]Application DataG-Lock SoftwareEasyMailDataEM50.mdb
On Windows 7 or Vista the path to the EM50.mdb file is
C:Users[USER]AppDataRoamingG-Lock SoftwareEasyMailDataEM50.mdb
Click on Test Connection button.
Click on the Advanced tab and check ReadWrite box in the Access permissions section. Click OK.

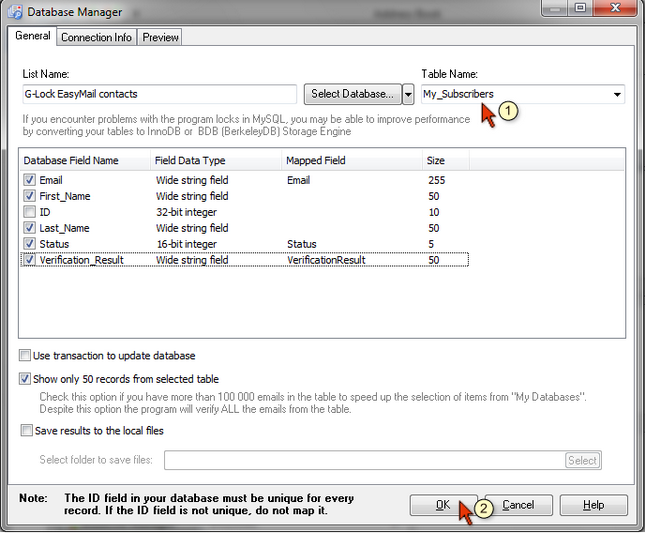
On the general Database Manager screen select the group name in G-Lock EasyMail v6 address book. To do this, click a down arrow in the Table Name field and select the group in G-Lock EasyMail v6 address book you want to verify the emails from.
Make sure the Email and VerififcationResult fields are mapped correctly. Remove the mapped value from the ID field.
Click OK to save the database connection.
Step 3. Verifying Email Addresses
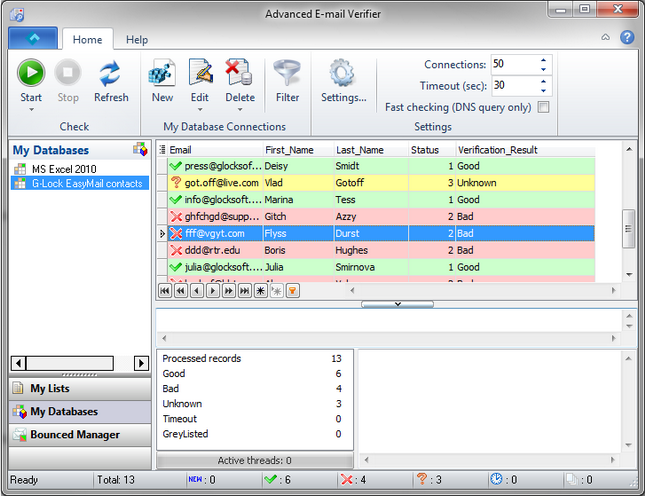
Put the cursor on the db connection name in the AEV.
Click Start button.
After the verification is complete you'll see the results in the VerificationResult column (good, bad, unknown).
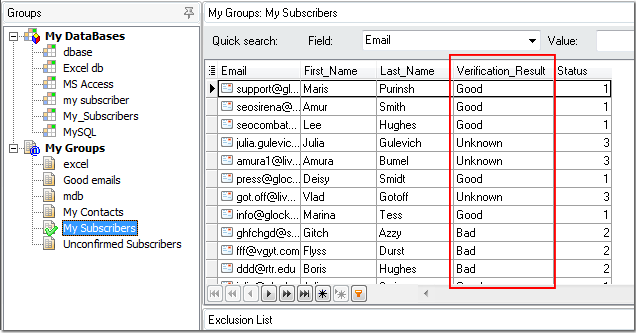
Now you can open G-Lock EasyMail v6 address book and see the result in the VerificationResult field.
Step 4. Adding Bad Email Addresses to the Exclusion List
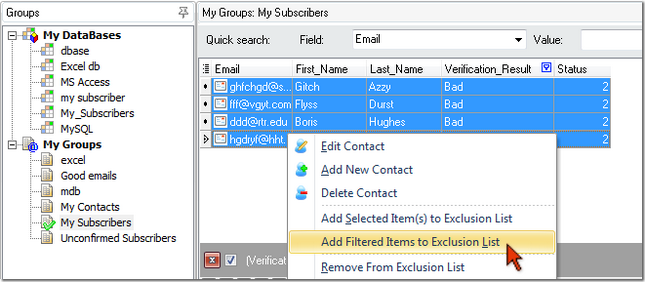
Filter the emails by the VerificationResult. To do this:
Click an arrow in the VerificationResult field heading
Select Custom.
Set the filter: VerificationResult like bad
Click OK.
When the emails are filtered, press CTRL+A on the keyboard to select all bad emails.
Click the right mouse button on the selected emails and select "Add Selected Item(s) to Exclusion List" option from the menu.
Bad email addresses will be added to the Exclusion List of the group. When you send a message to this group the next time, the message won't be sent to bad emails.