How to Import Emails from a Multi-Column CSV File into the List and Export the Fields in the Same Format After Verification
This tutorial will teach you how to import the email addresses and other contact information like first name, last name, address, city, state, zip etc. from a multi-column CSV file into the list in the Advanced Email Verifier and export all the fields after the verification.
Step 1. Creating List with Custom Fields in the Advanced Email Verifier.
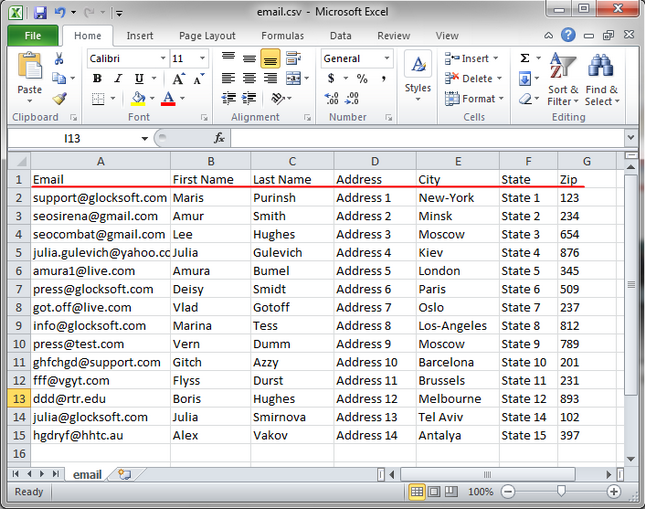
Here is a sample CSV file with multiple columns:
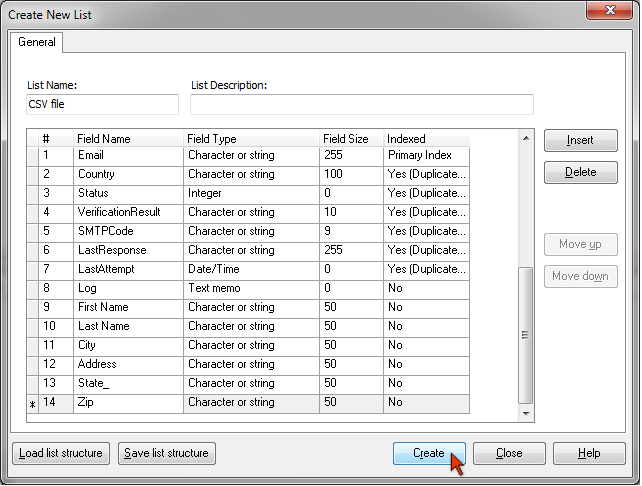
Before you can import all the columns into the Advanced Email Verifier, you need to create a list with custom fields. To do this:
– open the Advanced Email Verifier
– click on My Lists tab at the left pane
– click New -> Create New List on the toolbar
– type a list name
– click Insert and type the field name (to add the next field, click Insert again and type the next field name).
– click Create
If the field name is highlighted by red, it's a reserved word in the Advanced Email Verifier. You must change the field name. Example: use State_ instead of State.
When the list is created, use the Import option to import the data from the CSV file.
Step 2. Importing Custom Fields from the CSV File into the List.
Put the mouse on the list name and click on Import under the Home menu.
Follow the steps of the Import Wizard:
1. Select the file type – Text file. Click Next.
2. Click […] button and select your CSV file on the disk. Click Next.
3. Enter 1 in the First Row field, or enter 2 if the first line in your CSV file contains the field names. Leave other fields as is.
Click Next.
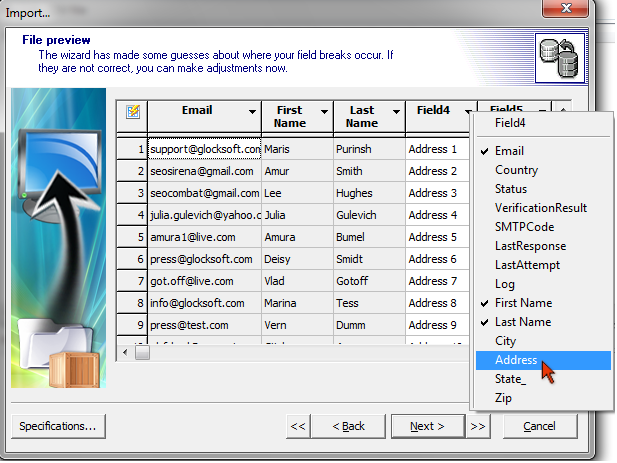
4. Assign the proper names to the fields. Click the black down arrow in the field title and select the field name associated with that field. The default Field1, Field2, Field3 etc. headings must be replaced with the real field names.
You must map all the fields properly, otherwise, no data will be imported.
Click Next.
5. Check if the fields in destination (Advanced Email Verifier) correspond to the fields in source (CSV file). Click Next.
6. Preview your data. Click Next.
7. Select the import mode 'Add: add records to the destination table'. Click Execute.
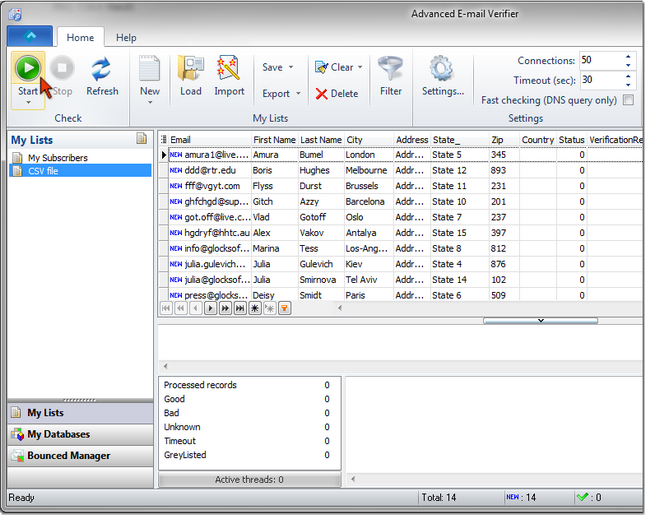
When the import is complete, you will see your data imported into the new list.
Click Start to start verifying the email addresses.
After the verification is complete, use the Export option to export all the fields to a file.