
How DKIM Works for Non Technical People
This is the guest post written by Steve Chou.
Email spam is a huge problem among ISPs. Because email has no gatekeeper, anyone can send an email to whoever they want under any name and impersonate other senders.
What’s worse, spam can be sent out in massive volume by bots and networks of infected computers.
If you take a quick look at your spam folder, you’ll probably see fake or spoofed emails from well known companies and even your friends! For example, I receive at least 2 or 3 fake emails impersonating Paypal every day.
How does your ISP know the difference between a real and a fake email? One way to tell whether an email is genuine or not is with DKIM.
In this post, you’ll learn how DKIM works and how you can use DKIM to ensure the deliverability of your email to the intended recipient.
What is DKIM?
DKIM stands for domain keys for identified mail and is a digital signature that is added to the head of every email you send to confirm that you are the authorized sender.
In order to enable DKIM, the sender must first add a special TXT or CNAME field to their DNS record with a special public and private key.
The private key is used by the sender to create a unique DKIM signature and the public key is used by the recipient to verify that the signature is valid in every email sent.
Here’s how email is exchanged when DKIM is enabled.
- When you send out an email, a digital signature is automatically generated using your private key and appended to your email header.
- When the incoming server receives your email, it checks the DNS record for the public key associated with your domain.
- Using the public key, the inbound server decodes the signature and compares the computed result against the value in your email.
- If they match, it verifies that the email is authentic and that the contents have not been compromised.
In layman’s terms, a DKIM signature acts like a hand signed signature when you pay by credit card at a brick and mortar store.
When you sign your receipt, the merchant compares your hand signed signature with the back of your credit card to make sure that you are the actual owner of the card.
The only difference is that DKIM is much more precise and secure 🙂
Why You Should Implement DKIM
Most people use the default settings for their email service provider (ESP) which results in suboptimal deliverability.
If you do not authorize your ESP to send email on your behalf (using your domain) with DKIM, then there’s a much higher likelihood that your email will go straight to the spam folder.
Not only that, but implementing DKIM also allows you to establish your domain’s sender reputation to make sure future emails reach the inbox.
Most ISPs assign a spam score when deciding how to route an email. When an email is sent from a trusted domain and verified through DKIM, the email’s spam score is significantly reduced.
However, when DKIM is not applied, the ISP will not be able to verify the sender’s identity which may result in the email being marked as spam, quarantined or tagged with “SPAM” in the subject line.
DKIM will also help prevent bots or malicious spammers from impersonating your domain.
For example, if a hacker tries to send an email on behalf of yourname@yourdomain.com without the proper private key, the DKIM signature will immediately fail and the email will likely go to spam.
Without DKIM enabled, no signature check occurs and there’s a higher likelihood that a spoofed email will reach its destination.
Today, almost every major ISP displays whether an email has been authenticated directly in the inbox. For example, Gmail inserts logos for DKIM authenticated emails and a “?” for unknown senders as shown below.

Unless you implement DKIM, email users may not even open your email if it reaches the inbox because it looks suspicious.
Bottom line, implementing DKIM will not only help email deliverability but also protect your sender reputation as well.
How to Implement DKIM
As mentioned earlier, implementing DKIM requires adding new fields to your DNS records.
In order to obtain the correct DNS entries to add, you must first contact your ESP directly for the proper information.
Every email provider will be different, so make sure that you follow their directions exactly.
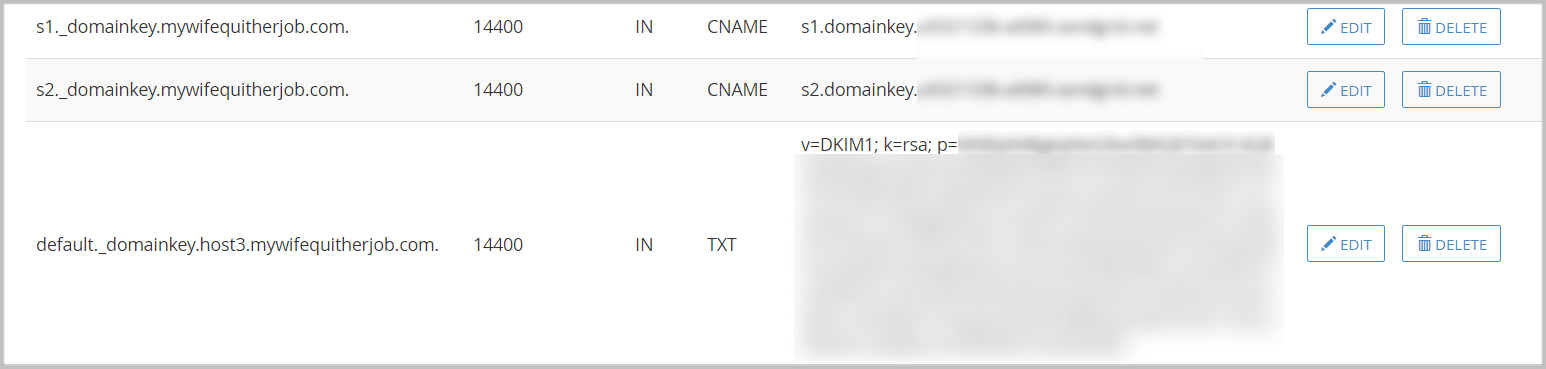
Here’s an example of my DNS setup for my ESP.
Once you have your DNS records set up, you must test your settings with a DKIM analyzer to make sure that everything is working.
The easiest way to test your DKIM settings is to try GlockApps for free.

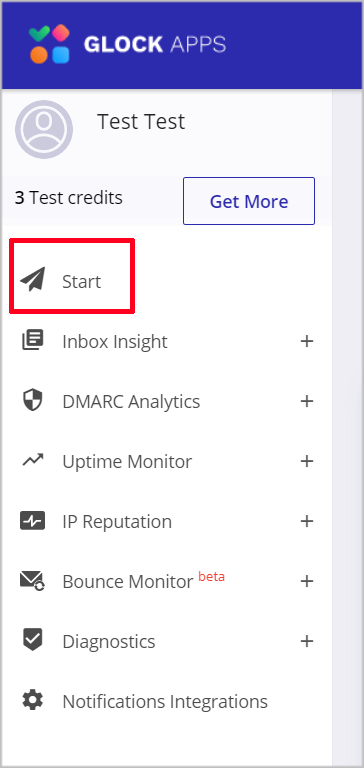
Running a simple deliverability test is free and you get 3 free test credits. Simply click on the start button after you’ve signed up.
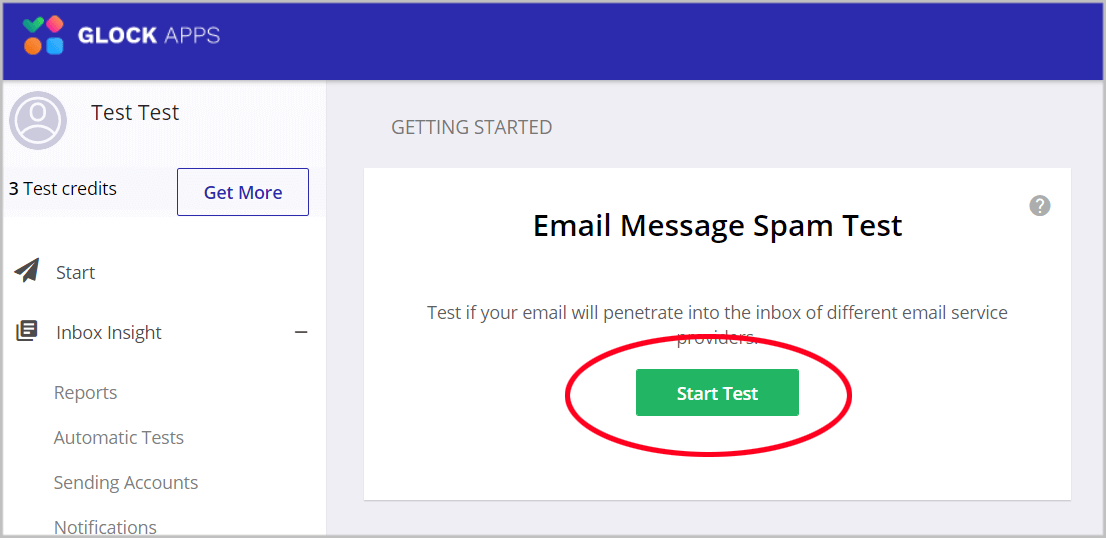
Select the “Email Message Spam Test”.
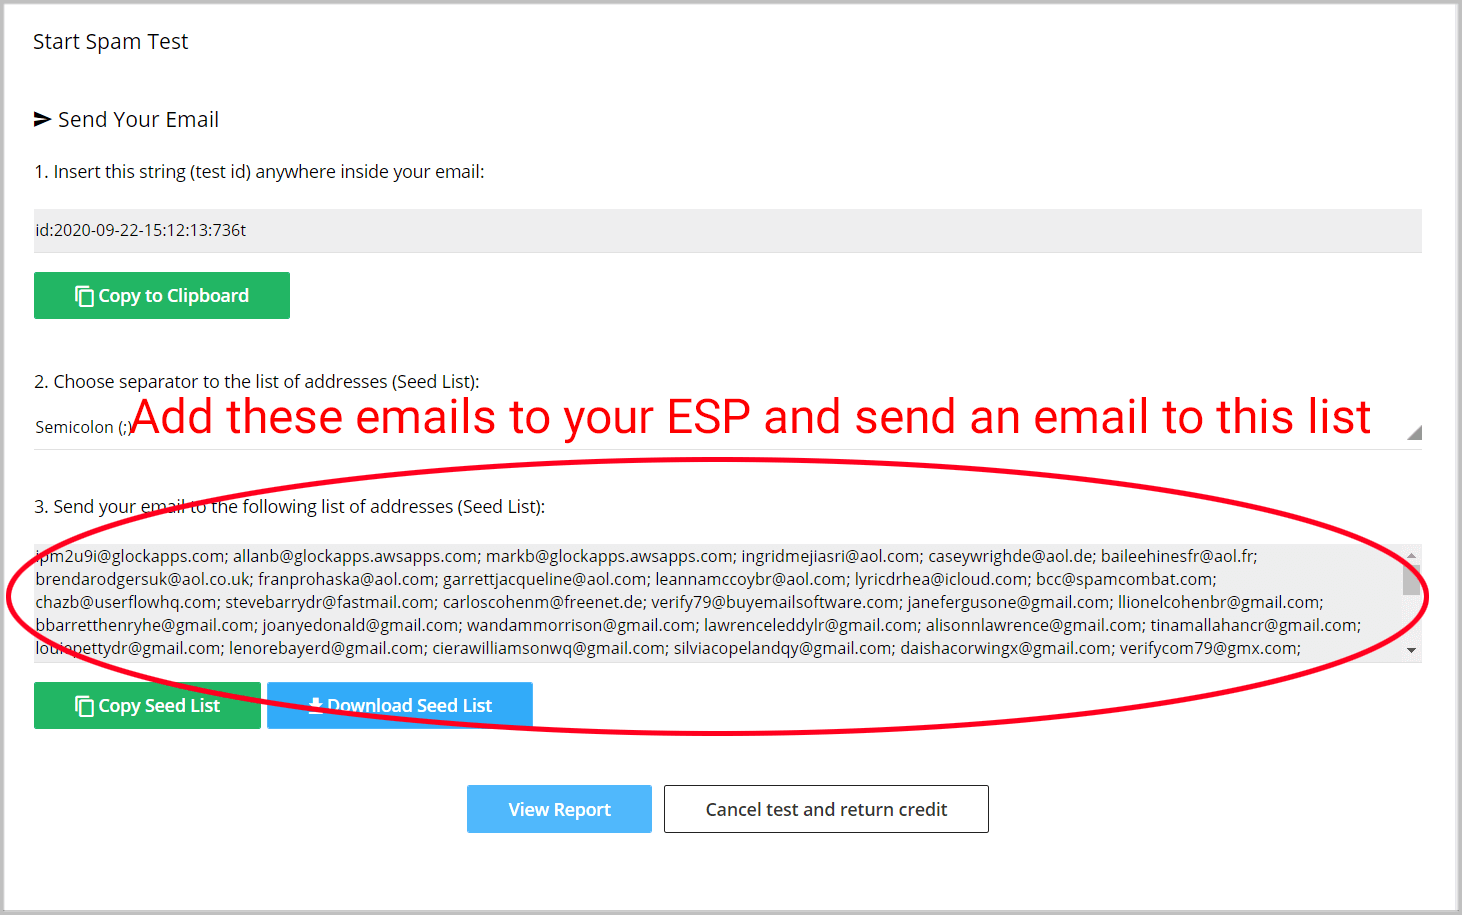
GlockApps will then provide you with a bunch of email addresses to add to your ESP. Follow the instructions and send an email to this entire list.
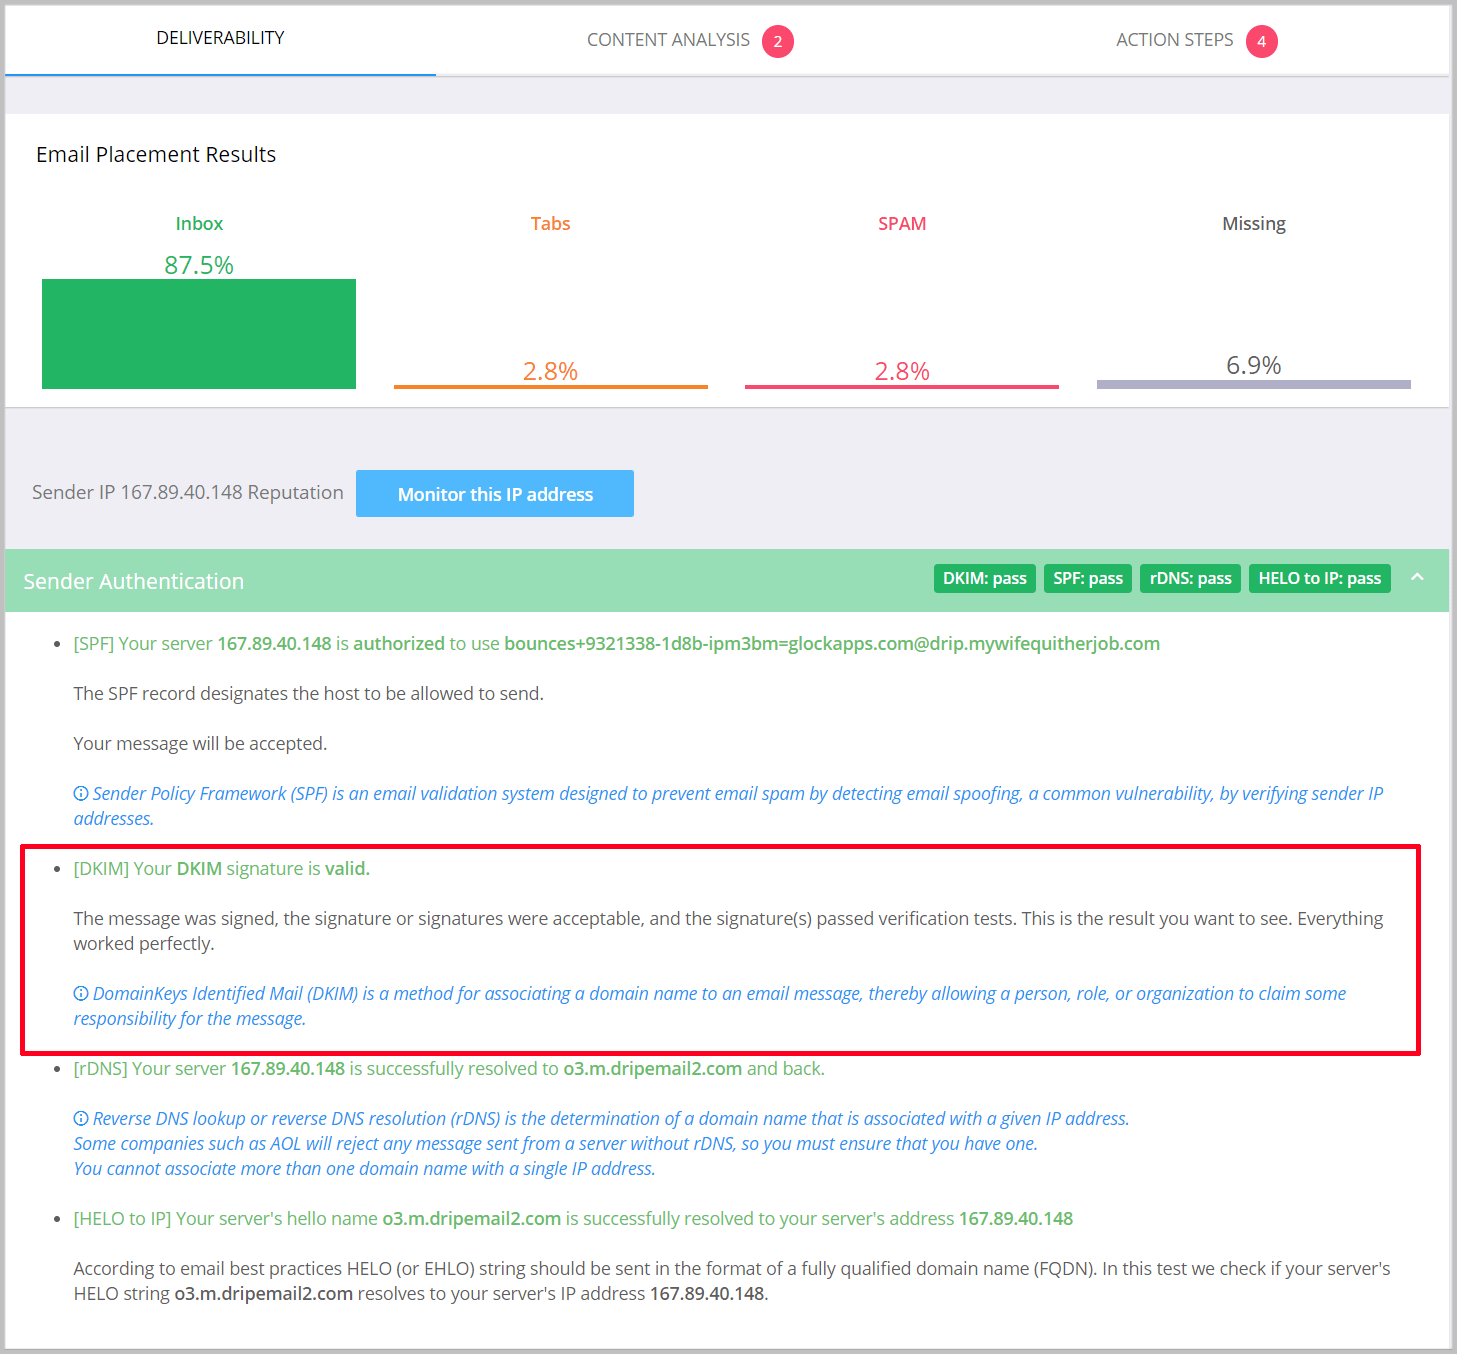
Within minutes, GlockApps will display an email deliverability report and check to see if you’ve implemented DKIM correctly.
While you are in GlockApps, you should also take advantage of their Uptime and DKIM monitor as well. If your site or email server ever goes down, you’ll be alerted immediately!
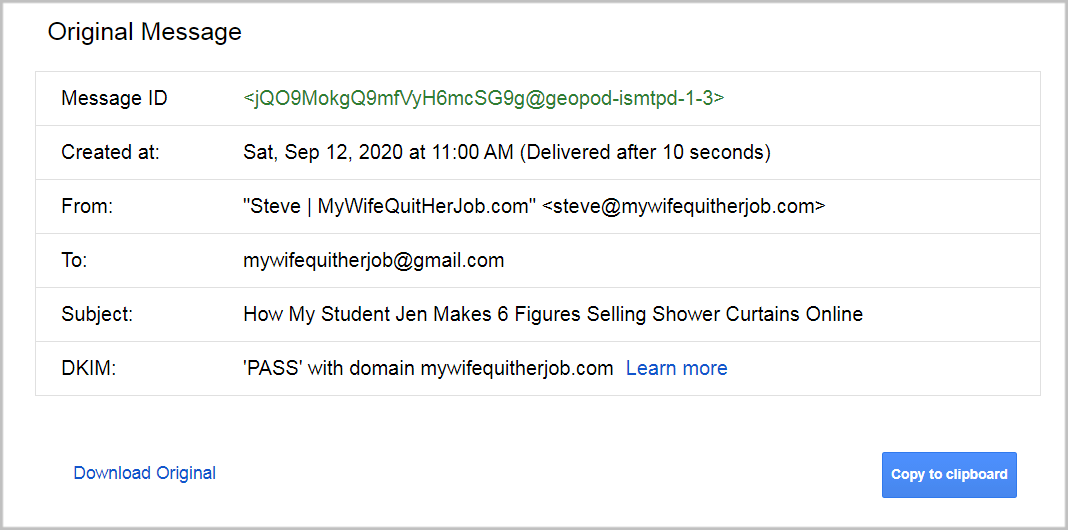
If you don’t want to use an external tool, you can also send an email from your ESP to gmail and select “Show Original”.

Gmail will then tell you if DKIM passed authentication.
DKIM Best Practices
Once you have DKIM implemented, here are some best practices to follow. First off, you should never ever share your private key with anyone.
If your DKIM key were to ever get compromised, hackers could send emails on your behalf and ruin your sender reputation.
Because malicious users are constantly attacking your email server, DKIM keys can sometimes get hacked or exposed.
As a result, you should change or rotate your keys on a regular basis. Most ESPs will provide you with 2 or more keys to enter into your DNS records for this exact reason.
By rotating your keys every 3-4 months, this will prevent malicious activity.
Further Reading
Building a large email list is pointless unless your email reaches its destination. While DKIM will verify the authenticity of your emails with ISPs, DKIM alone is not enough. You should also implement SPF and DMARC.
SPF, DKIM and DMARC work together to enable different facets of email authentication and deliverability.
- SPF defines which IP addresses are allowed to send mail for your domain.
- DKIM prevents your email from getting faked, spoofed or altered.
- DMARC defines how ISPs should handle emails that fail either SPF or DKIM.
Once you have all 3 in place, your email will not only be secure but you’ll maximize your deliverability as well.