How to Add the Unsubscribe Link and Process Unsubscribes Automatically
To make your newsletters compliant with CAN-SPAM law, you must add the unsubscribe link to each message you sent. Plus, by providing people with an easy way to unsubscribe, you let the subscribers know you respect their wish to leave the list and you minimize your spam complaint and bounced rate.
The industry average UNSUBSCRIBE rate is 2% per newsletter. List churn is a natural thing, and although it’s not a positive experience, it’s better to let people unsubscribe than risk having your emails marked as spam because if your spam complaint ratio exceeds 0.1 – 0.2% per message, your newsletters may get blocked by providers such as Yahoo! and Gmail and never reach the inbox.
With EasyMail7 you can setup and handle:
unsubscribe process via email (mailto:) (default)
Online Unsubscribe Process
To use a more professional unsubscribe process done online, you can use these tools together with EasyMail7:
1. G-Lock Analytics.
You can use the unsubscribe link provided by our G-Lock Analytics email tracking service. In addition to opens and clicks, G-Lock Analytics tracks unsubscribed recipients. When you enable G-Lock Analytics tracking for your message in EasyMail7, the program automatically uses the unsubscribe link provided by G-Lock Analytics. The unsubscribe process is done online.
Unsubscribed recipients will be stored in your account in G-Lock Analytics. You can set EasyMail7 to automatically add unsubscribed contacts collected by G-Lock Analytics to Global Exclusion List so that you do not have to manually export and import unsubscribes into EasyMail7 exclusion lists. Plus, these contacts will be automatically marked as “unsubscribed” in the EasyMail7’s internal groups.
Watch this 3-minute video to see it in action:
When the G-Lock Analytics tracking is enabled, the unsubscribe process is handled online through G-Lock Analytics even if you send the email to external groups including WPNewsman lists.
Here you can read more about how to use G-Lock Analytics email tracking service with EasyMail7. G-Lock Analytics is not a free service. You can see our plans and prices here.
2. EasyMail7’s Subscription Forms.
With EasyMail7, you can create subscription forms, place them on your website and collect email leads into the EasyMail7 groups in real time. EasyMail7 allows you to organize a single opt-in or confirmed opt-in process.
EasyMail7 is supplied with default email messages and action pages used in the subscription process.
When you send a message to a list collected by a form and if the user clicks the unsubscribe link, the unsubscribe process is handled online.
Here you can read more about how to create subscription forms in EasyMail7 and use them to collect email subscribers.
3. WPNewsman.
If you have a site on WordPress, you can install our WPNewsman plugin to your site and import your contact list into WPNewsman database. Then you create a link from EasyMail7 to your contact list stored in WPNewsman.
When you connect to WPNewsman’s list, EasyMail7 will automatically use the unsubscribe link provided by WPNewsman. In this case the unsubscribe process is done online. When the recipient clicks on the unsubscribe link, he is unsubscribed in the list in WPNewsman and EasyMail7 automatically excludes that recipient for further mailings.
You can use WPNewsman on your site completely free of charge. To collect more email subscribers, you can put WPNewman’s opt-in form on the site sidebar or inside any article, page or post on your site and convert your website visitors into email subscribers.
Unsubscribe Process via Email
EasyMail7 is supplied with a ready to use unsubscribe link. The default unsubscribe link in EasyMail7 is linked to “mailto” and makes the recipient send you an unsubscribe request via email. In addition, you can have a custom unsubscribe link for each group and database.
Read on to know how to add the unsubscribe link to your messages.
Step 1. Customize the Unsubscribe Link.
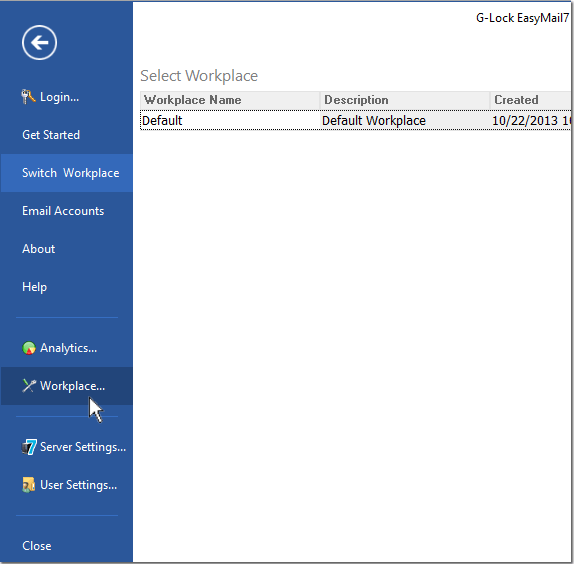
Click on the “Settings” menu.
Click on "Workplace".
Under "Profile Links" tab in the Workplace Settings you can customize the default unsubscribe link which reads like
mailto:%%Return_Email%%?Subject=Unsubscribe:%%Email%%&body=Unsubscribe:%%Email%%
where %%Return_Email%% will be replaced by the "Return Email Address" from your Account settings and %%Email%% will be replaced by the recipient's email address.
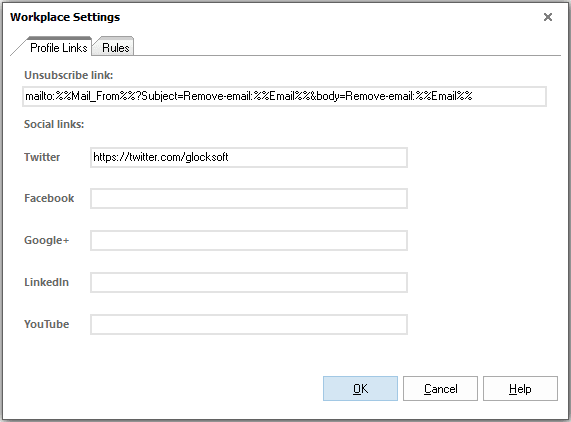
By default unsubscribe requests come to your "Return email address".
If you want to receive the unsubscribe requests at your "From" email address, replace the %%Return_Email%% variable in the unsubscribe link with the %%Mail_From%% variable.
In addition, under "Profile Links" you can enter the URLs to your social profiles on Twitter, Facebook, Google+, LinkedIn and Youtube.
Profile links are common for all groups and databases within the current workplace.
If you want to have a custom unsubscribe link for each group and/or database, enter it under the "Group Links" tab.
Go to "Contacts".
Click on the group name and click "Edit" on the menu bar.
Click on the "Group Links" tab.
Enter a custom unsubscribe link that you want to use for the selected group. You can also enter social links that you want to use only for this group.
Click OK.
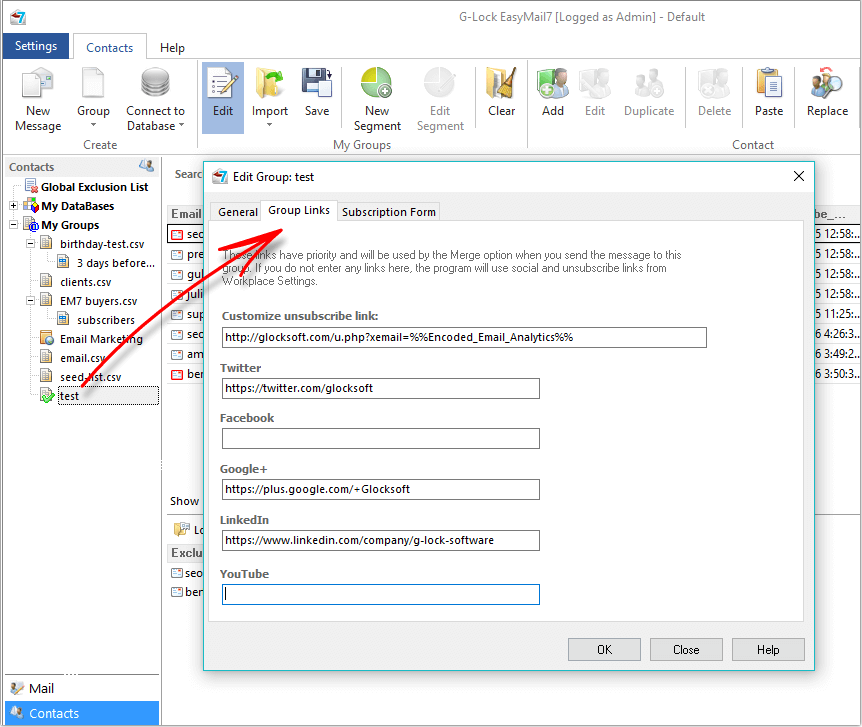
Using the above procedure you can enter different unsubscribe and social links for all groups and databases.
Group links have priority and will be used by the Merge option in the first place.
Step 2. Add the Unsubscribe Link to the Message.
Put the mouse at the place in the message where you want to add the unsubscribe link.
Click on the "Dynamic Fields" menu.
Select "Unsubscribe link".
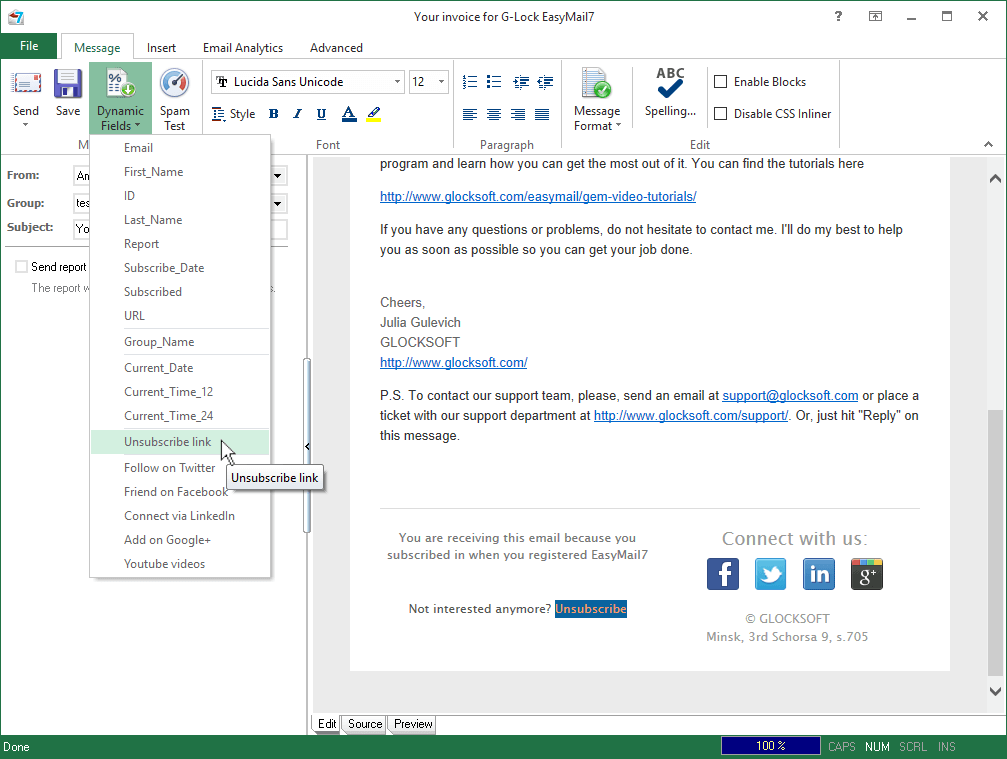
The program will merge the "tag://%%unsubscribe%%" tag with the "unsubscribe" anchor text.
Step 3. Send the Message with the Unsubscribe Link.
Click the Send button and select the sending action depending on when you want to send the message.
During the message sending G-Lock EasyMail7 automatically replaces "tag://%%unsubscribe%%" with the unsubscribe link from "Group Links" of the group. If you did not enter any custom unsubscribe link in "Group Links", the program will use the unsubscribe link from "Profile Links" in Workplace settings.
Step 4. Unsubscribe Contacts in Contact Groups.
You can set the Bounce Handler in G-Lock EasyMail7 to automatically unsubscribe contacts in your groups and/or add unsubscribed recipients to the Global Exclusion List.
The Bounce Handler recognizes unsubscribe emails with the “Unsubscribe” word in the Subject only.
To unsubscribe contacts, in the Account settings in the Bounce Handler select the “Unsubscribe bounce emails in all internal groups” action (this action applies for unsubscribe emails too).
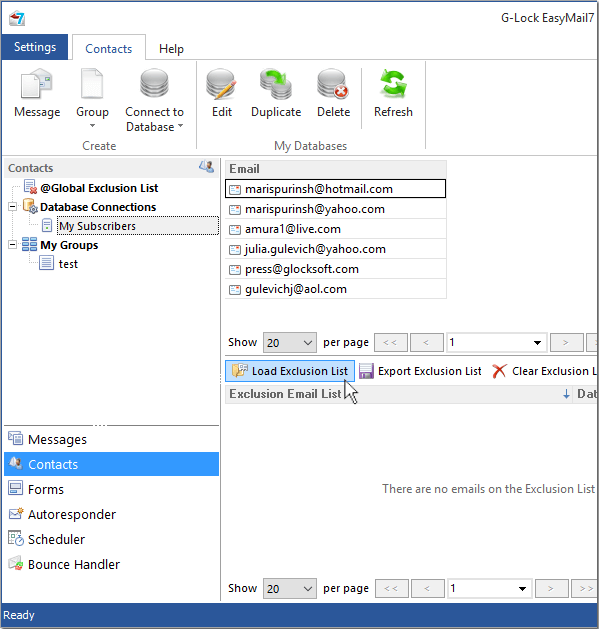
To add unsubscribed recipients to the Global Exclusion List, check the “Add all unsubscribes to the Global Exclusion List” option. The Global Exclusion List works for all internal and external groups (databases you created links to) at the same time.
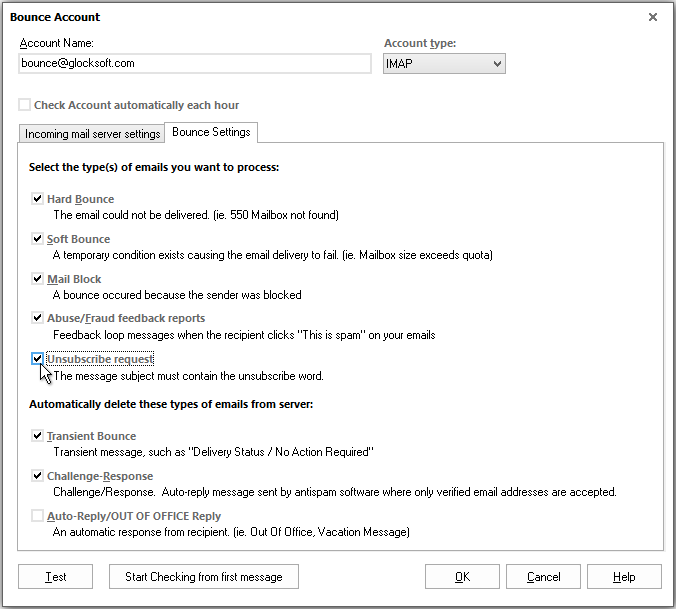
Do not forget to check the “Check Account Automatically Each Hour” option to make the Bounce Handler process unsubscribes on auto-pilot.

And under the Bounce Settings tab check the “Unsubscribe request” box.
The current version of G-Lock EasyMail7 cannot automatically unsubscribe contacts in external groups (databases). So, if you store contact lists in an external group and connect to the contact database from G-Lock EasyMail7, you can only use the option to add unsubscribed contacts to the Global Exclusion List.
Or, you can save unsubscribed emails to a file and then load them into the exclusion list of the appropriate group in G-Lock EasyMail7.
Step 5. Delete Unsubscribed Contacts from Contact Groups
The current version of G-Lock EasyMail7 cannot automatically delete unsubscribed contacts from internal or external groups. If you want to delete unsubscribed recipients, you have to manually save them to a file and then delete from your groups.
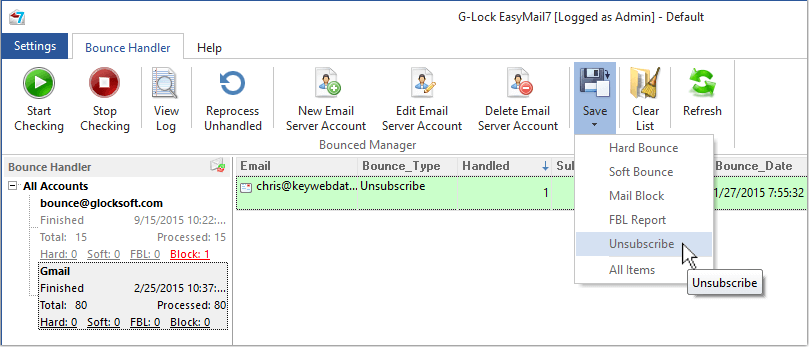
To save unsubscribed emails to a file, click “Save” on the menu bar in the Bounce Handler and select “Unsubscribe”.
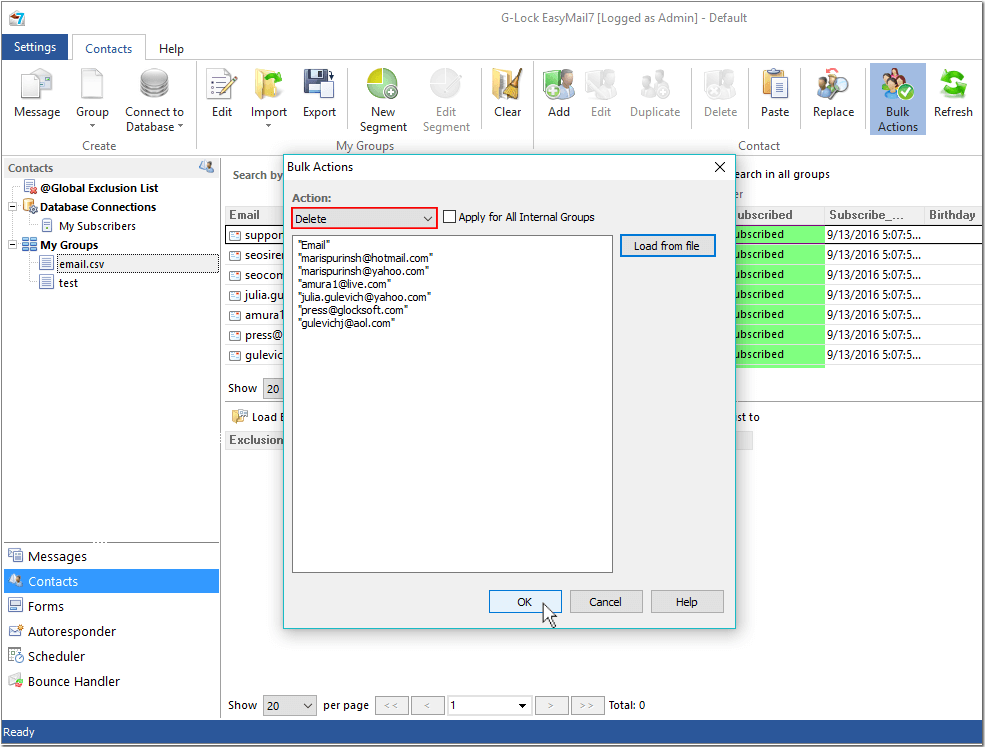
Go to "Contacts".
Click on “Bulk Actions” on the menu bar.
Choose the action “Delete”, check the “Apply for All Internal Groups” option, load the file with unsubscribed emails and click OK.
If you want to automatically delete unsubscribed emails or update the emails’ status in your database, you can use a separate program, for example, our G-Lock Email Processor.