How to Track Email Opens and Link Clicks
G-Lock EasyMail7 is integrated with our email tracking service G-Lock Analytics. G-Lock Analytics is a cost-effective web service to track email campaigns in real time. You can easily track your email campaigns all over the world and clearly understand who from your customers are most interested in your emails, or what part of them they like more.
G-Lock Email Analytics is an extremely sophisticated email tracking service that provides real time tracking: email opens and clicks, prints and forwards, geographical location and email clients the recipients use to open the email. Unlike other email tracking services, with G-Lock Email Analytics you can brand your tracking links with your domain and make them look friendly for your recipients.
Plus, EasyMail7 with G-Lock Email Analytics uses the encrypted recipient’s email address in the tracking links to enhance Inbox delivery because modern anti-spam filters may block email messages with links containing an email address.
When you use G-Lock Analytics, the unsubscribe process is handled online. And you can set EasyMail7 to automatically add unsubscribed contacts collected by G-Lock Analytics to Global Exclusion List so that you do not have to manually export and import unsubscribes into EasyMail7 exclusion lists. Plus, these contacts will be automatically marked as ‘unsubscribed’ in the EasyMail7’s internal groups.
Watch this quick video to learn how easy it is to send emails and track email opens and link clicks using EasyMail7 and G-Lock Email Analytics.
Step 1. Signup with G-Lock Analytics.
To be able to use G-Lock Analytics service, you must create an account on G-Lock Analytics. To create the account:
1. Go to G-Lock Analytics website.
2. Click "Signup".
3. Choose a plan.
4. Click "Signup" for the plan of your choice.
After you signup, the system automatically creates your user account in our database. Your login email address and password will be sent you via email.
Step 2. Upload Redirect Script to Your Web Site.
To track emails with G-Lock Analytics and brand your tracking links with your domain, you must upload the redirect script to your website.
1. Login on https://app.glockanalytics.com/login.
2. Click on "Account".
3. Download the redirect script.
If your website is hosted on a Unix/Linux platform, download the PHP redirect script.
If your website is hosted on a Windows platform, download the ASP or ASPX redirect script.
4. Upload the redirect script to your website using any FTP client, for example, FlashFXP.
To make sure the script is working on your site, open the script URL in the browser.
If it redirects to our http://glockanalytics.com/about/emltr page, the script is working and can be used for tracking.
Step 3. Login to Your Account from G-Lock EasyMail7.
Enter your login information in G-Lock EasyMail7.
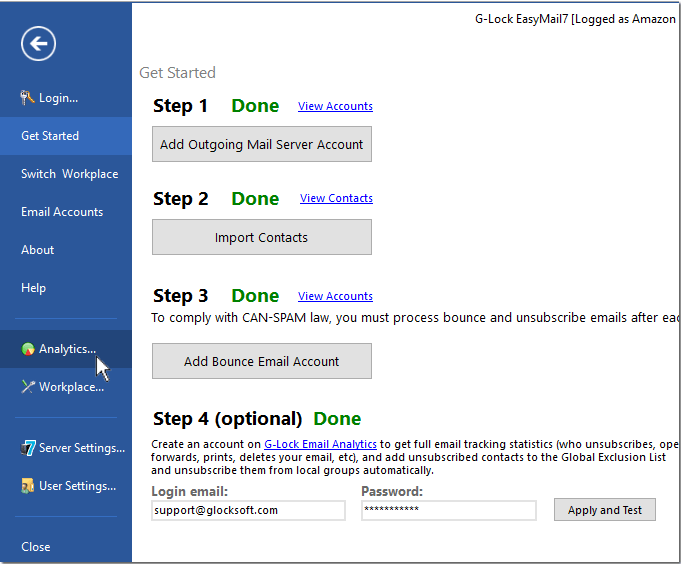
1. Go to " Settings -> Analytics".
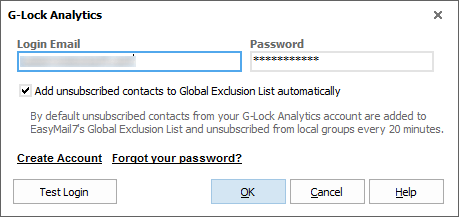
2. Enter your login information for your account on G-Lock Analytics:
Login Email: email address you use to login to your account on G-Lock Analytics.
Password: password for your account on G-Lock Analytics.
Click on "Test Login" button to test your login.
If you want EasyMail7 to automatically add unsubscribed contacts collected by G-Lock Analytics to Global Exclusion List, leave the “Add unsubscribed contacts to Global Exclusion List automatically” option checked. Plus, these contacts will be marked as ‘unsubscribed’ in the EasyMail7’s internal groups.
Click OK to save G-Lock Analytics Settings.
Step 4. Create Email Campaign.
After you are logged into your G-Lock Analytics account and uploaded the redirect script to your website, you can add an email campaign. An email campaign is the email message you will send and track.
To add a campaign:
1. Create an email message.
2. Click on "Email Analytics" tab on the Edit Message window.
3. Click on "Enable Tracking" button.
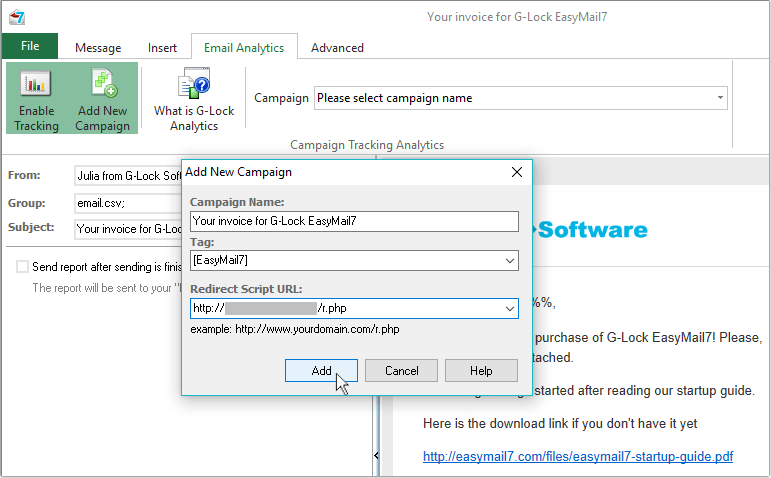
4. Click on "Add New Campaign".
5. Fill in the form:
Campaign Name: any name for your campaign (you can enter the subject of your email, for example)
Tag: a tag if you want the campaign to be tagged automatically in your account (tags help sort the campaigns out)
Redirect Script URL: type the URL of the redirect script on your website.
Example: http://www.yourdomain.com/r.php
6. Click "Add" to add the campaign.
The campaign will be added to your G-Lock Analytics account and will be automatically selected in the "Campaign" field.
Step 5. Send Email with Tracking Links.
G-Lock EasyMail7 adds the code to track opens, prints and forwards to your message source automatically during the sending process. If your message contains links, G-Lock EasyMail7 automatically converts normal links into tracking links and inserts tracking links into the message. Also, G-Lock EasyMail7 automatically reports the number of recipients to whom the message was sent to the campaign in your G-Lock Analytics account. The number of recipients is required to correctly calculate open and click rate.
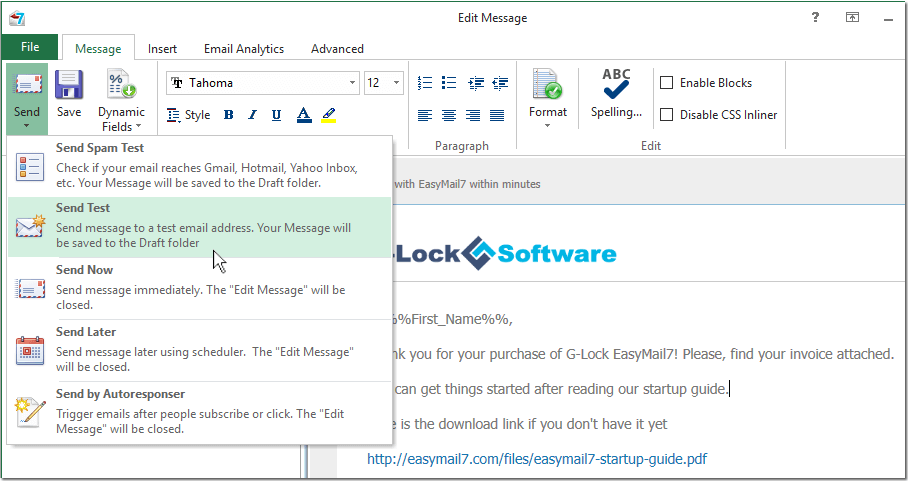
Click on the Message menu.
Select the account in the From field.
Select the group in the Group field.
Click "Send".
At first you can send a test message to make sure the tracking code works well.
After testing your email copy and tracking links, you can send the message to your subscribers.
As we said, G-Lock EasyMail7 will replace ALL normal links in your message with tracking links. But there are two cases when links are not be replaced by tracking links:
1) If a link includes a merge field, for example, http://twitter.com/glocksoft%%Comment%%
2) If a link is already converted into the tracking link.
Trick: how to keep an original link in the email if you don't want to track it.
Go to the HTML source of the email, find the link, put the mouse at the end of the link, click on the Merge menu and merge a field that is empty for this group in G-Lock EasyMail7 address book. For example, http://twitter.com/glocksoft%%Comment%%
Now when the link contains a merge field, it will not be replaced with the tracking link. Since the %%Comment%% field is empty in the address book, nothing will be merged at the end of the link.
The link will look like http://twitter.com/glocksoft when your subscribers receive the email.
Step 6. Get Email Tracking Reports.
You can see the email tracking statistics overview right inside G-Lock EasyMail7. Just click on “Click to View Stats” link for the message in the Outbox.
The Overview shows the open rate and click rate, the number of opens, clicks, forwards, and unsubscribes. Plus, you can quickly see how many recipients read, glanced and skimmed your email.
To get the full campaign statistics, click on “View Details”. You will be redirected to the campaign reports in your account on G-Lock Analytics website.
![]()
You can also login to your account from G-Lock Analytics website and see the reports at any time.
Click on the campaign name.
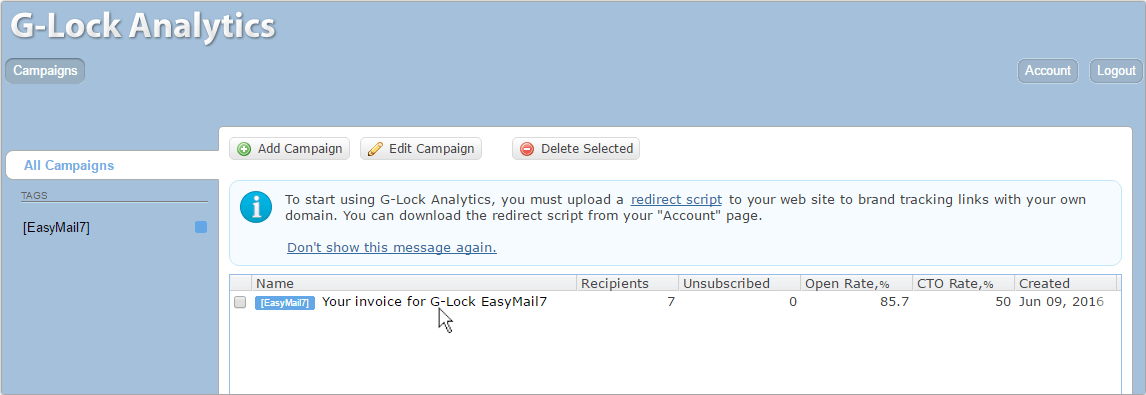
At the left side under "Reports:" click on the report name to see the email tracking stats.
Overview
In the "Overview" report here you can see: total of recipients, number of unique/total opens, how many recipients opened your email in the plain text format (%), number of unique/total clicks, number of email prints and forwards, number of bounce emails, number of unsubscribes.
Timeline
The "Timeline" report shows the campaign statistics for a certain period of time. You can define the time period yourself: month, day, or hour.
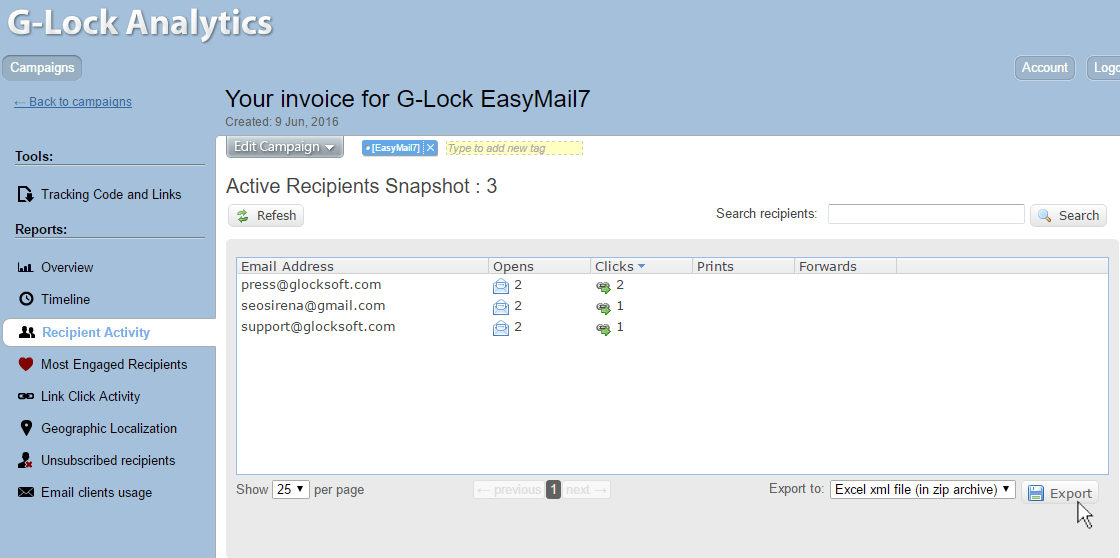
Recipient Activity
In the "Recipient Activity" report you can see the email addresses of the recipients who opened your email, clicked on the links within the email as well as who printed and forwarded your message. You can export the email addresses either to a CSV file or Excel XML file.
Note: Each time the recipient prints or forwards the email, G-Lock Analytics records an additional open. That's why the number of opens for the recipient may be higher than the real number of times the recipient opened the email.
Most Engaged Recipients
Here you can see a list of most engaged recipients of your email campaign. Most engaged recipients are determined based on the number of opens/clicks that you define in your account settings. Click on the "Account" and look at the bottom of the page. By default most engaged recipients are selected by 3 opens/clicks.
Link Click Activity
The "Link Click Activity" report will show you which links in your email were clicked, who clicked them and how many times. You can export the report either to a CSV file or Excel XML file.
Geographic Localization
Under "Geographic Localization" you can see the recipient’s activity on your email all over the world for a selected period of time. Put the mouse on a country to see how many visits your email got from that country. Under the map there is a list of countries and the number of email opens from each country.
Unsubscribed Recipients
Here your unsubscribed recipients will be collected if you use the unsubscribe link generated by G-Lock Analytics. You can export unsubscribes to a CSV file, zipped CSV file or Excel XML file. If you set EasyMail7 to automatically add unsubscribed contacts collected by G-Lock Analytics to Global Exclusion List, the program checks the “Unsubscribed Recipients” report every 20 minutes and add new unsubscribes to the EasyMail7’s Global Exclusion List. Plus, these contacts will be automatically marked as ‘unsubscribed’ in the EasyMail7’s internal groups.
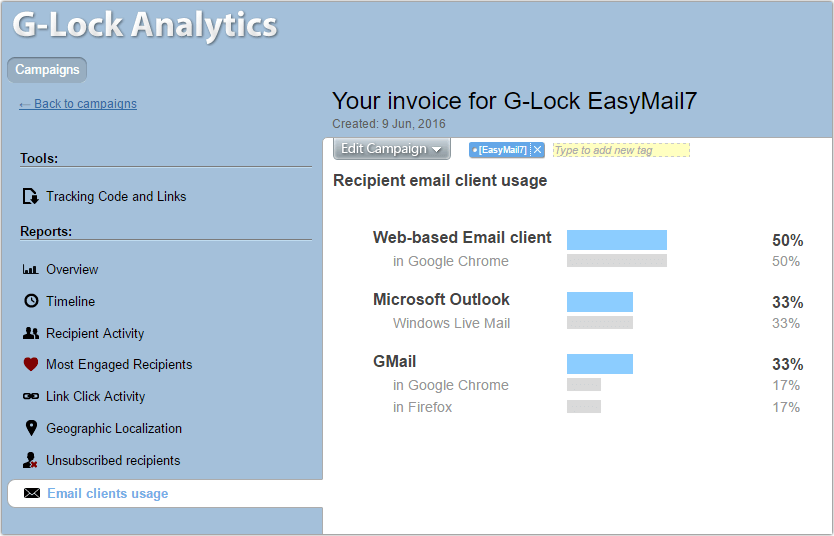
Email Clients Usage
This report provides a great overview of which email clients are popular among your recipients and helps you save your time when creating your email newsletter as you can focus on tailoring your email for most used email clients only.