How to Use Mailgun SMTP Settings in EasyMail7 to Send Email Newsletters
G-Lock EasyMail7 works perfectly with any third party SMTP server and delivery service like Amazon SES, SendGrid, Mailjet, Mailgun and others.
This tutorial guides you through the steps how to configure EasyMail7 to use the Mailgun’s SMTP settings to send your email newsletters in style.
The tutorial assumes that you have already installed and activated either the trial or licensed version of EasyMail7.
Configuration of EasyMail7 with Mailgun SMTP
Step 1. Add and Verify Domain with Mailgun.
If you don’t have an account with Mailgun yet, you can create a free account here.
The free account allows you to send the first 10,000 emails every month for free.
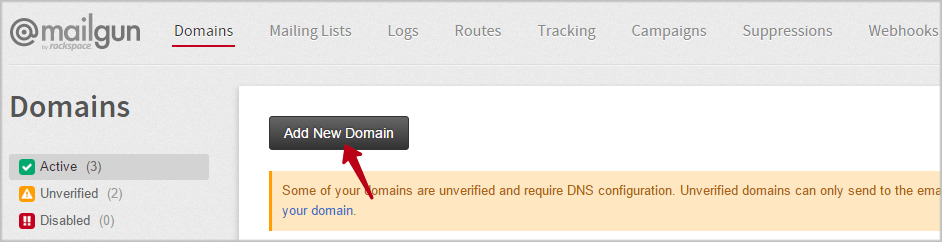
After you signup, login to your Mailgun account and go to Domains.
There, click on "Add New Domain".
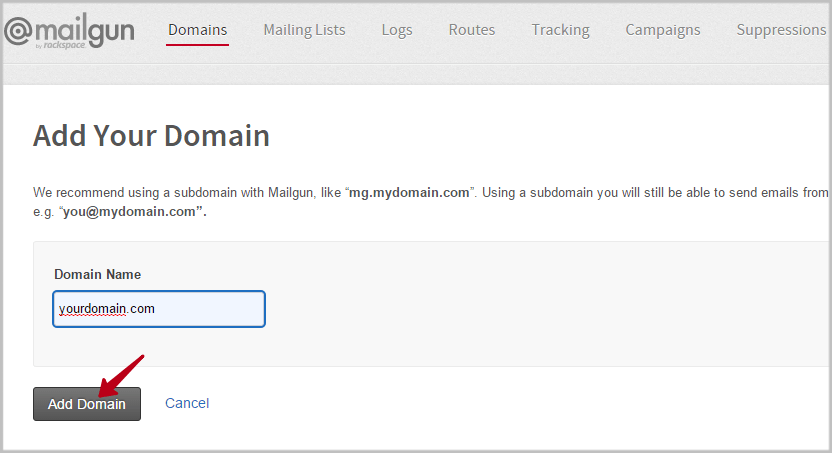
Type in your domain that you will use to send emails from and click “Add Domain”.
Perform 5 steps to verify your domain with Mailgun.
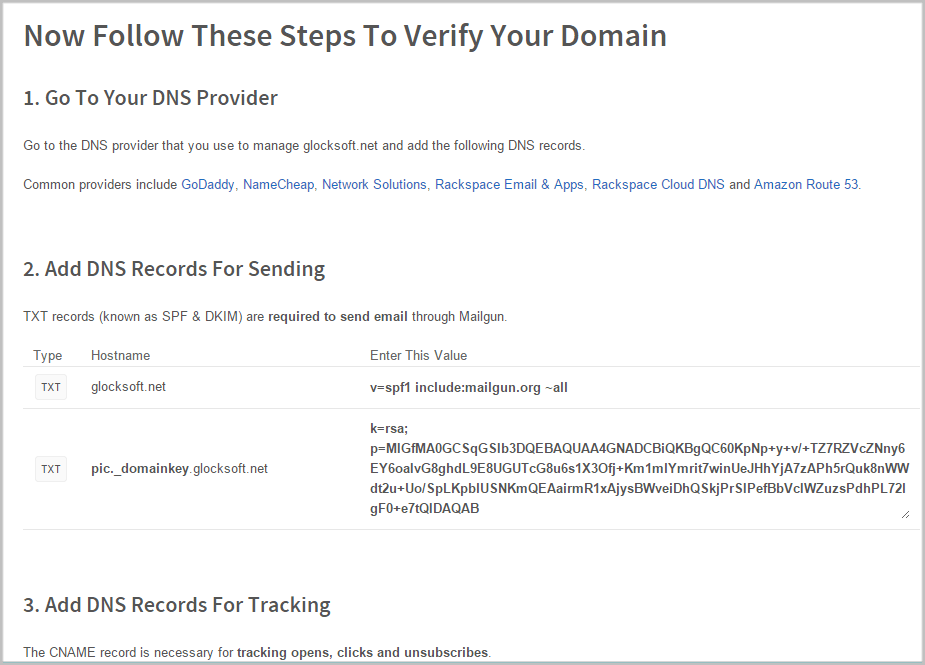
Then wait for your domain to be verified.
Once you make the required DNS changes it can take 24-48hrs for those changes to propagate. Mailgun will email you to let you know once your domain is verified.
Step 2. Get Mailgun SMTP Credentials.
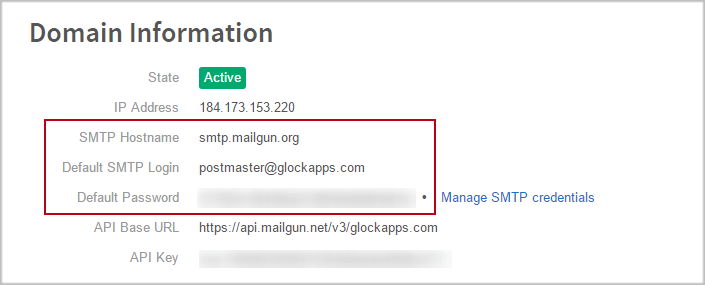
Once your domain is verified, it will acquire the status “Active” in your Mailgun account dashboard.
Click on the domain to get the SMTP credentials.
The credentials you need are: SMTP Hostname, Default SMTP Login and Default Password.
Step 3. Enter Mailgun SMTP Credentials in EasyMail7.
Start EasyMail7 and go to Settings -> Email Accounts.
Click “Add New”.
Enter the account name, your “From” name, “From” email address, “Bounce (return)” email address and “Reply” email address under the General tab.
Then click on the “Delivery Options” tab.
Choose the “Send via SMTP Server” delivery mode and enter the SMTP credentials you’ve got from Mailgun:
SMTP Server: smtp.mailgun.com
My server requires authentication: checked
Login: your Default SMTP Login ([email protected])
Password: your Default Password
Also, choose the Security protocol Default (No SSL) and enter the port 25.
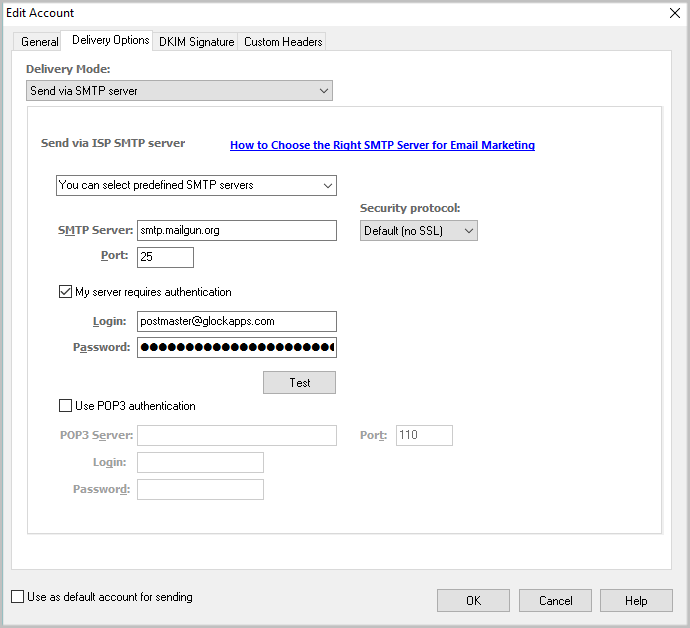
Click “Test” to test the SMTP settings.
If you receive a test email from EasyMail7, everything is good and you are done. If not, double check if your settings are correct.
How to Track Bounce Emails from Mailgun
Mailgun does not forward bounce emails to your Return email address. Thus, you need to use a separate tool for bounce email processing. You can use the GlockApps spam testing tool to track bounce emails using Mailgun’s webhooks.
The GlockApps Bounce Monitor provides real-time analytics about your bounce messages. It collects bounce emails and shows you the bounce error code and reason so that you can see why the email bounced: hard or soft bounce, block or complaint.
It differentiates bounces by the sender email address, sender domain and provider. It also shows you a graphic diagram in order you can see spikes in your bounce rate over time.
GlockApps will provide you with bounce email reports that you can download and load into G-Lock EasyMail7’s Global Exclusion List to exclude bounce emails from your email campaigns.
Read also: How to Track Mailgun Bounces with GlockApps