How to Use Amazon SES API in G-Lock EasyMail7 to Send Bulk Emails
Amazon Simple Email Service (Amazon SES) is a highly scalable and cost-effective bulk and transactional email-sending service for businesses and developers. Subscription is quick and is on pay-as-you-go basis. You can read more about Amazon SES here.
EasyMail7 connects with Amazon SES via API. So you need to setup an Amazon SES account before you can start using it with EasyMail7.
Once your SES account is created, you will have to generate your IAM credentials i.e. your unique Access Key ID and Secret Access Key and enter those credentials in the EasyMail’s Email Account settings panel.
Also you will have to verify your sending and bounce email addresses with SES to send emails through it and you will have to request your sending quota with SES.
Below is the step by step procedure to connect EasyMail7 with Amazon SES.
Step 1. Set up Amazon SES Account.
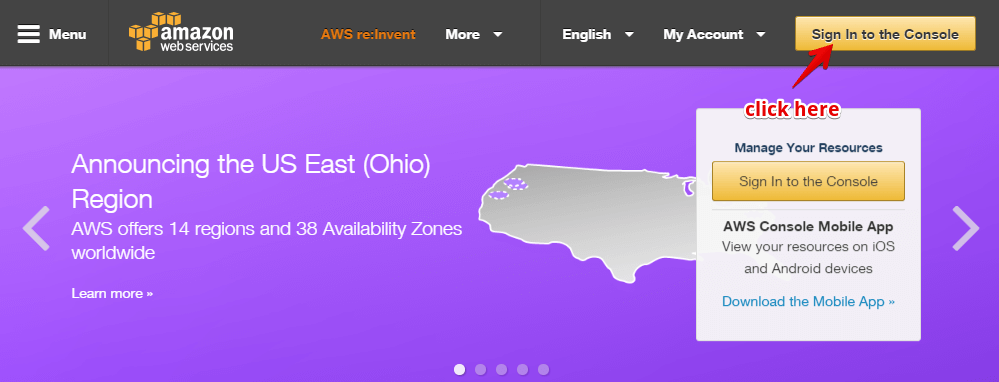
Go to https://aws.amazon.com/ and click on “Sign in to the console” button.
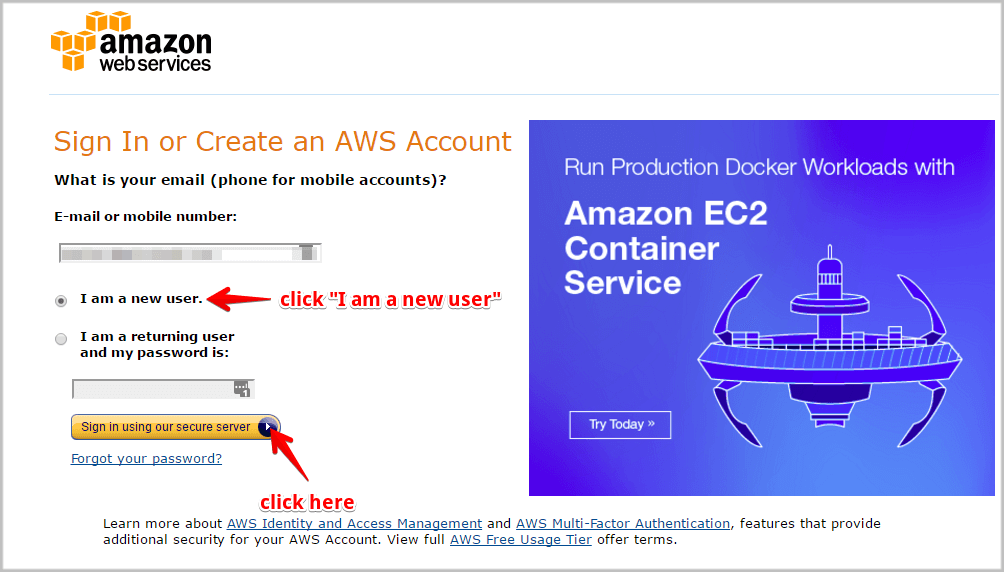
On the page appeared, you will have two options: to sign in or to create an account.
If you already have an amazon.com account simply enter your email address and select “I am a returning user and my password is” option and enter your password.
If you are a new user enter your email address and select the “I am a new user” option.
Click on “Sign in using our secure server” button.
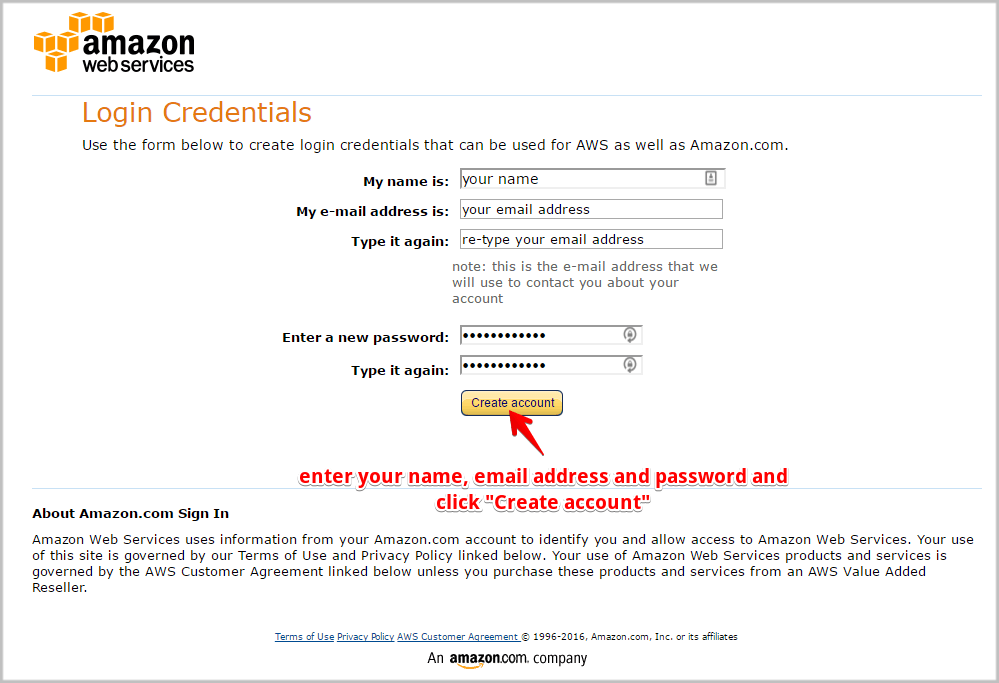
Now enter your name, re-type your email address and a password.
Click “Create account”.
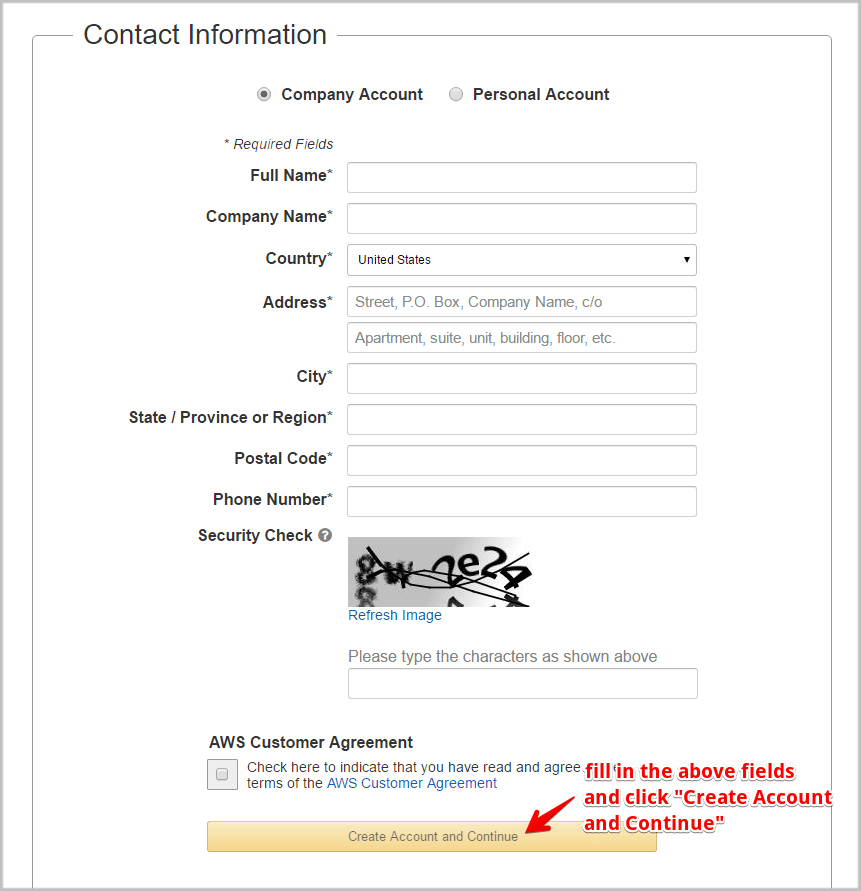
Now you are redirected to a page asking for your contact information.
There you need to fill your basic information like your name, your company’s name, your country, your address, your city, state, postal code, and your phone number.
In a security check area, enter the captcha.
Put a tick on the AWS customer agreement (after reading it properly) and click on “Create account and continue”.
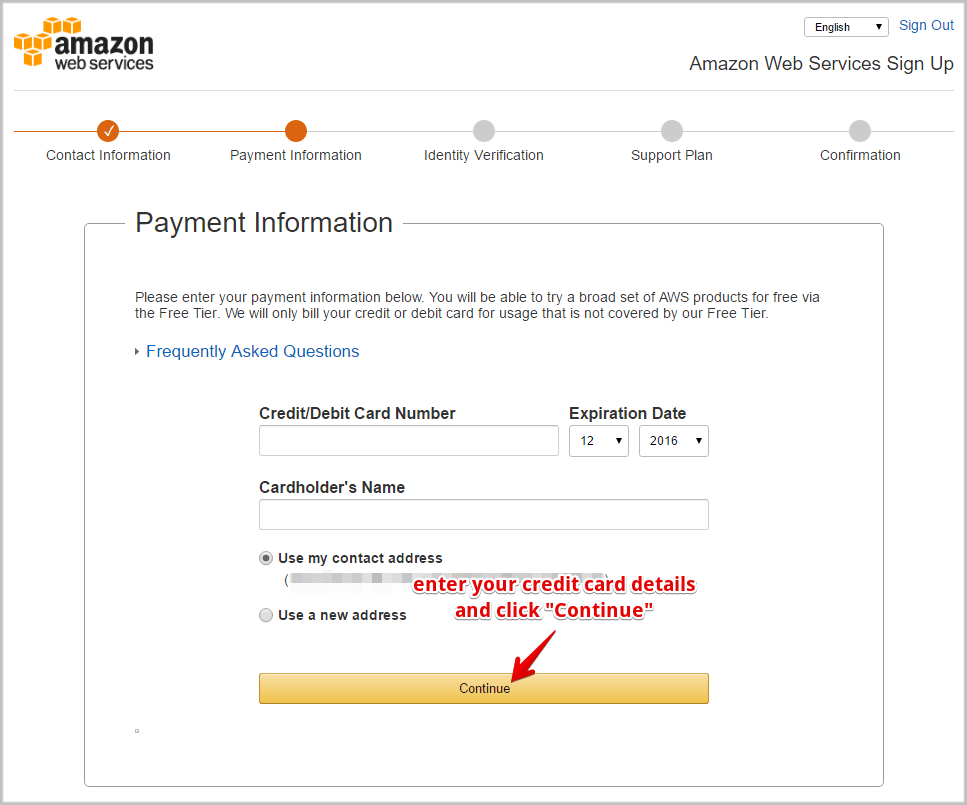
Now on the payment information page enter your credit card number and expiration date followed by card holder’s name.
Here you also have a choice of selecting your billing address; choose your billing address and click “Continue”.
At the next step, you have verify your identity by providing your phone number and clicking “Call me now”.
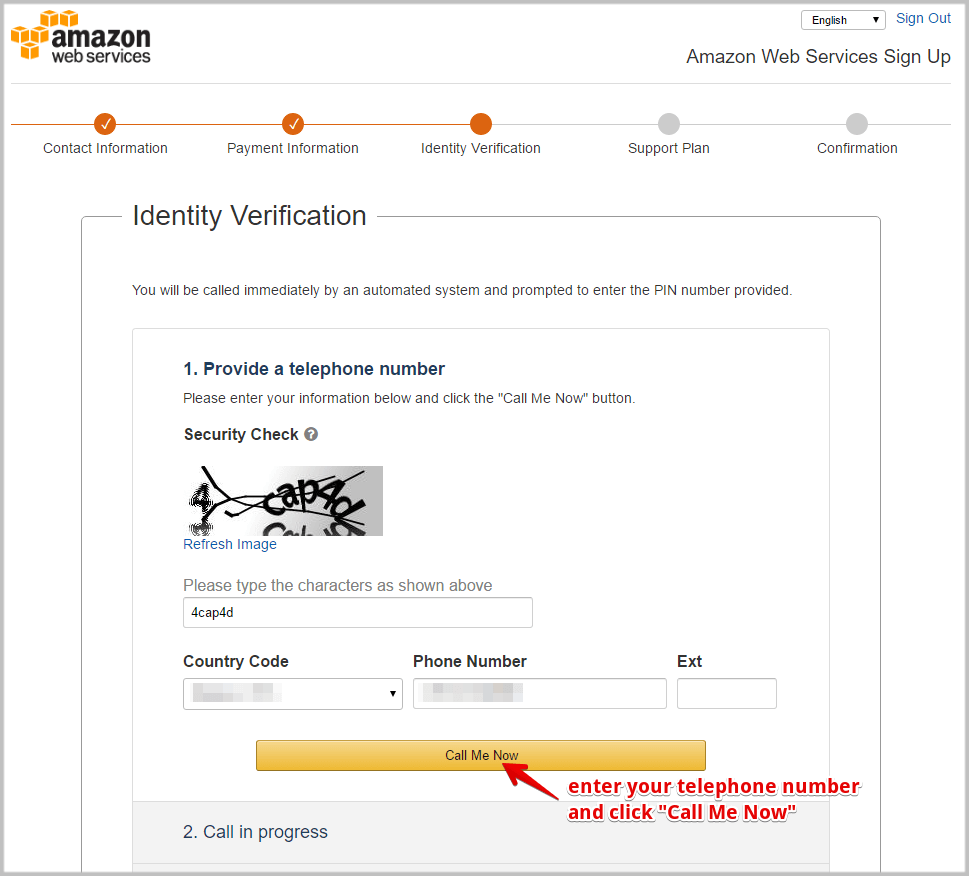
You will get a 4-digit verification code and will receive an automated call simultaneously.
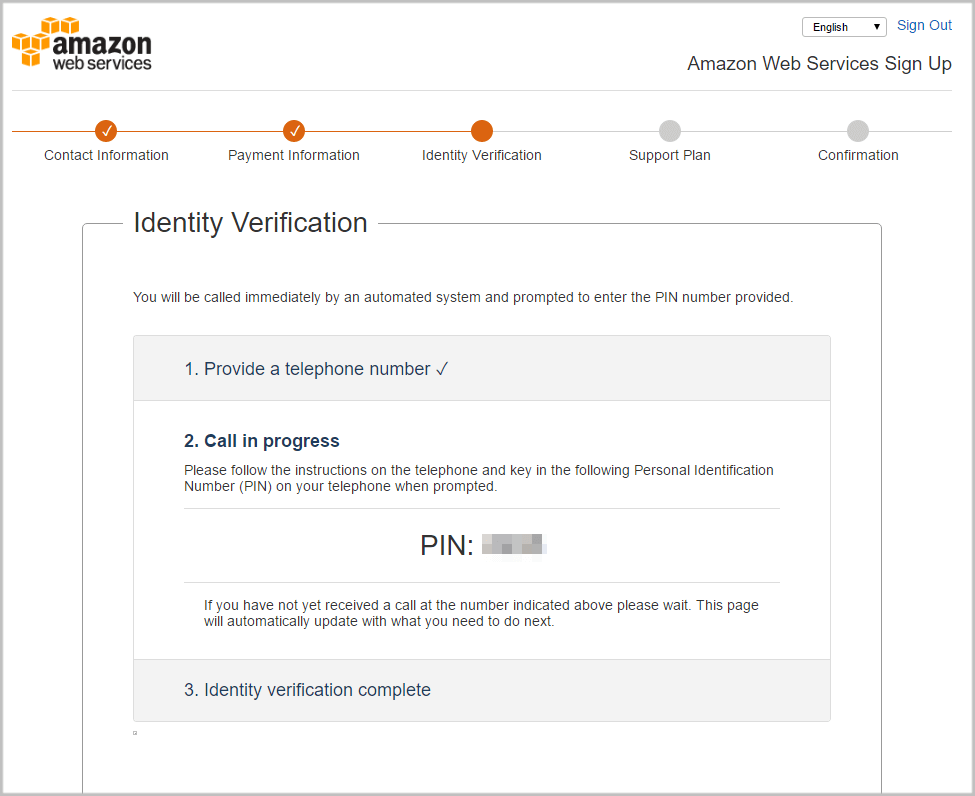
Enter the received code through your phone.
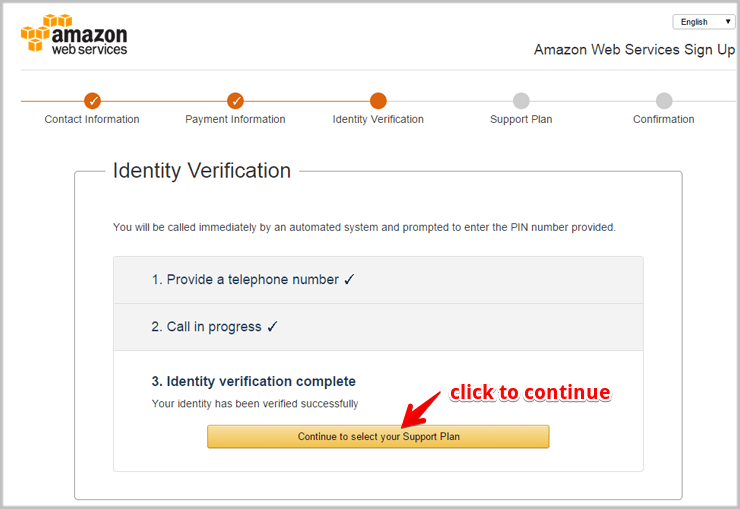
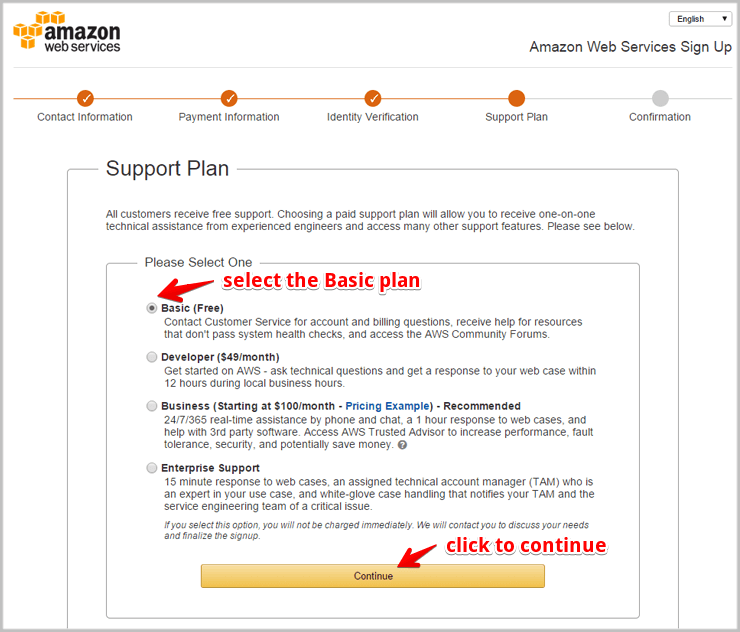
When you see a window confirming your verification click “Continue to select your Support plan”.
Select the Basic plan and click “Continue”.
On a welcome page, click the “Launch management console” button.

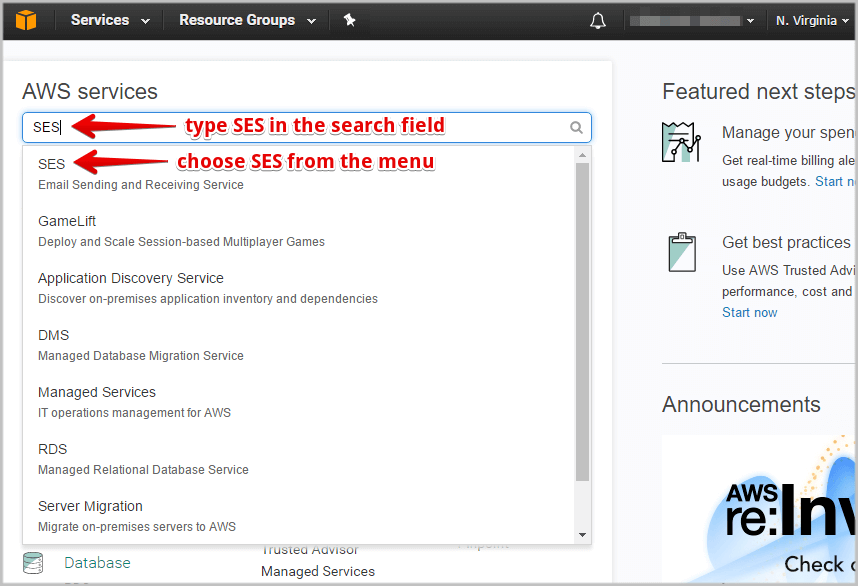
Type SES in the search field and then select SES from the menu to start with the email service.
Click the “Sign up for Amazon SES” button.
This may take some time, so be patient. You will receive an email once your account is ready.

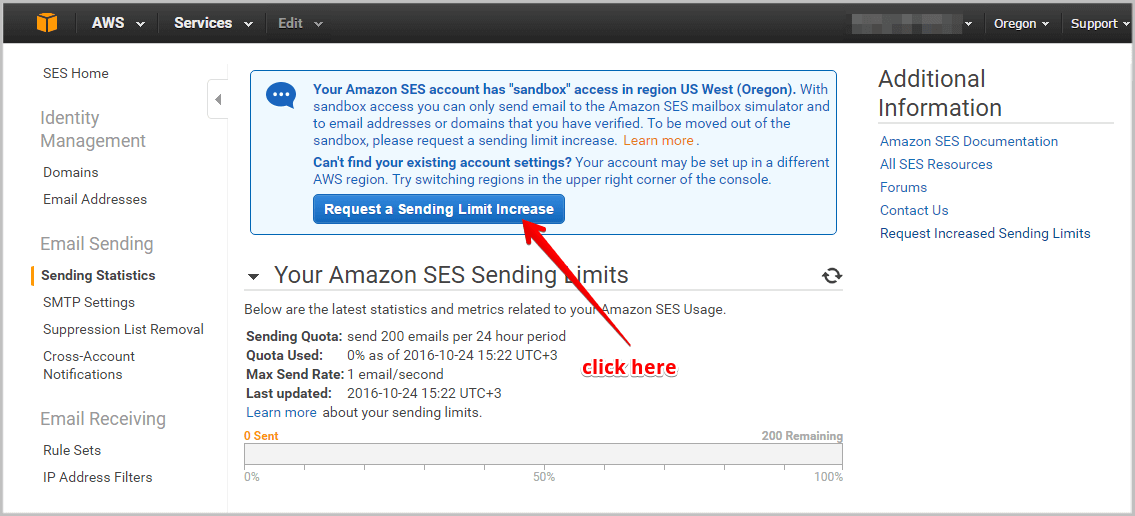
Once you receive your confirmation email, go to your AWS account and click on “Sending Statistics” at the left side.
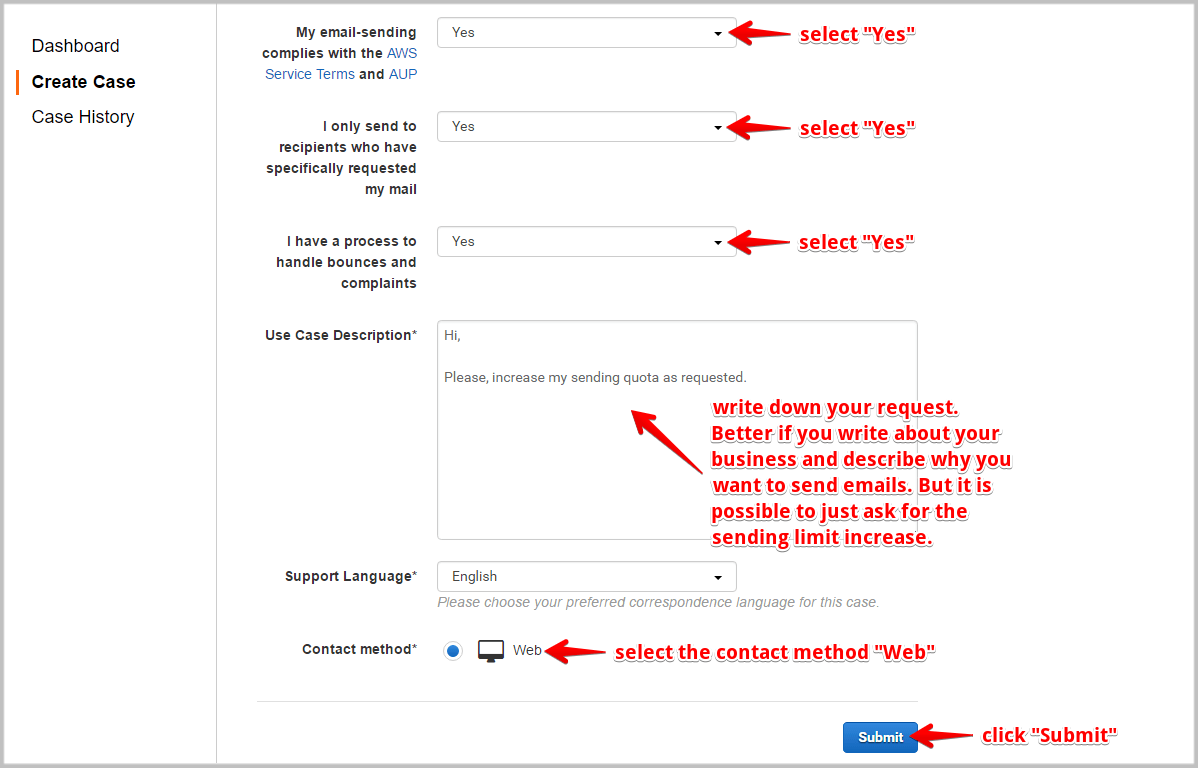
Click on the “Request a Sending Limit Increase” button.
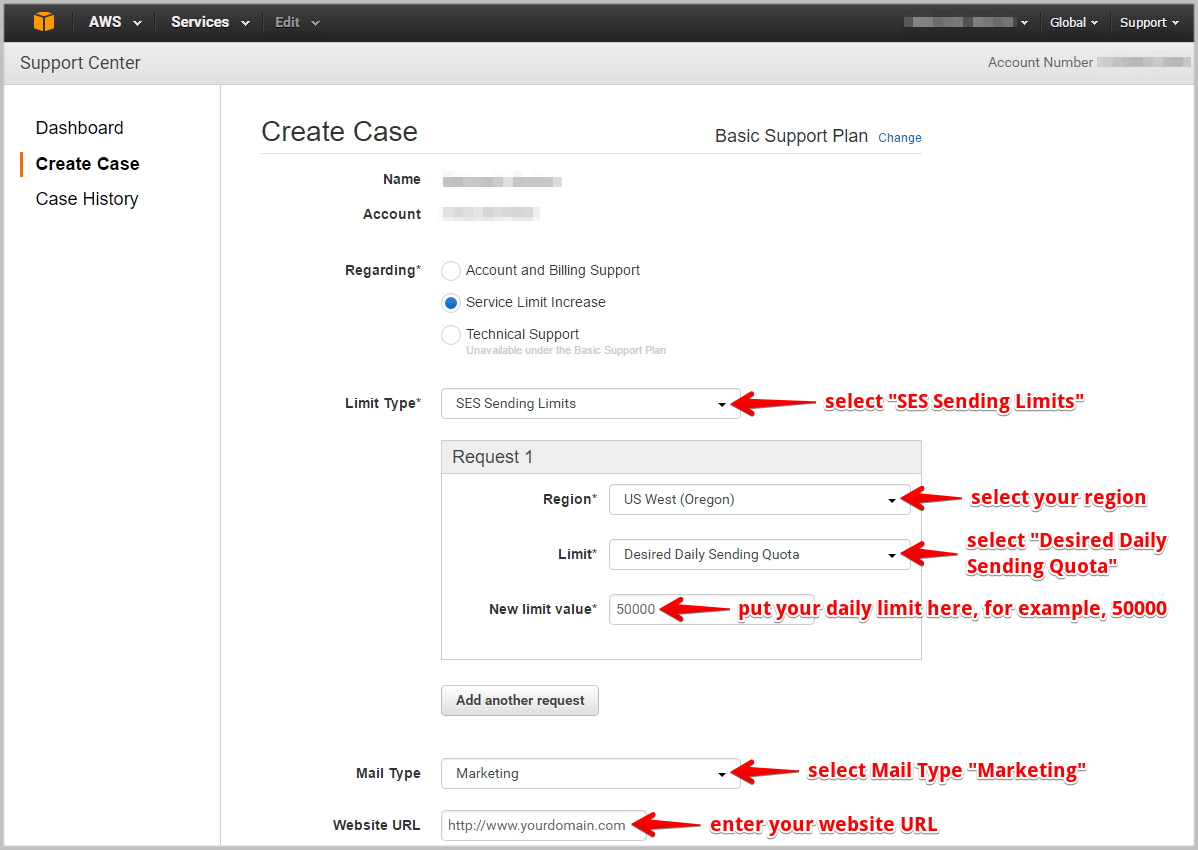
By doing this you will open up a case where you will be asked to select your region, your website’s URL, etc.
Fill all the required information and click “Submit”.
Now wait. Your case is now taken to AWS and to approve your request, it may take a couple of hours.
When your request is fulfilled, you will receive an email.
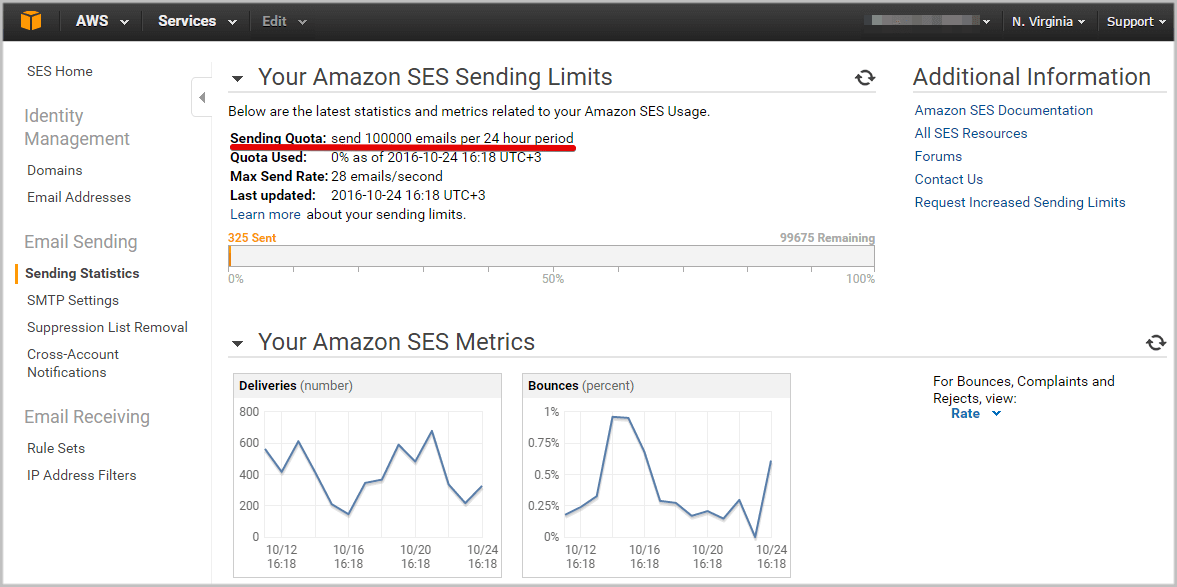
You can check your sending quota in your AWS management console where your email sending limit will be mentioned.
When you finished with the AWS account creation, you can go to the next step and create your IAM credentials.
Step 2. Generate IAM Credentials.
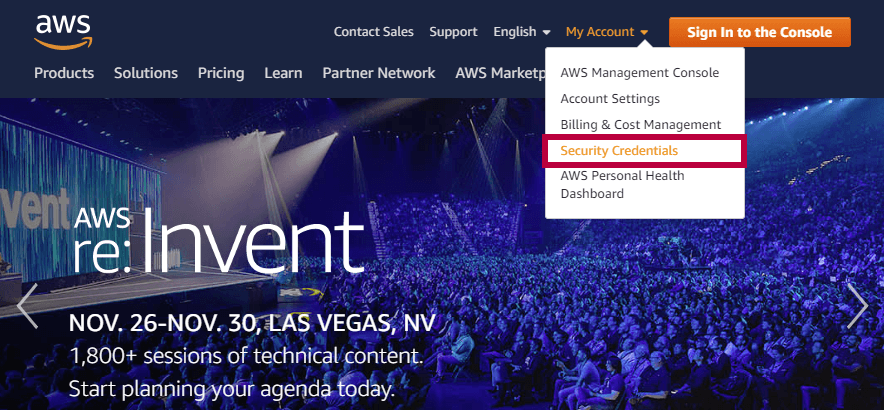
Go to "Account -> Security Credentials".
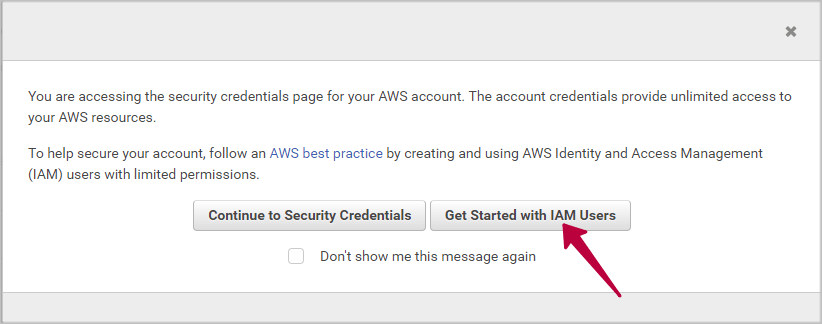
Click on “Get Started with IAM Users”.
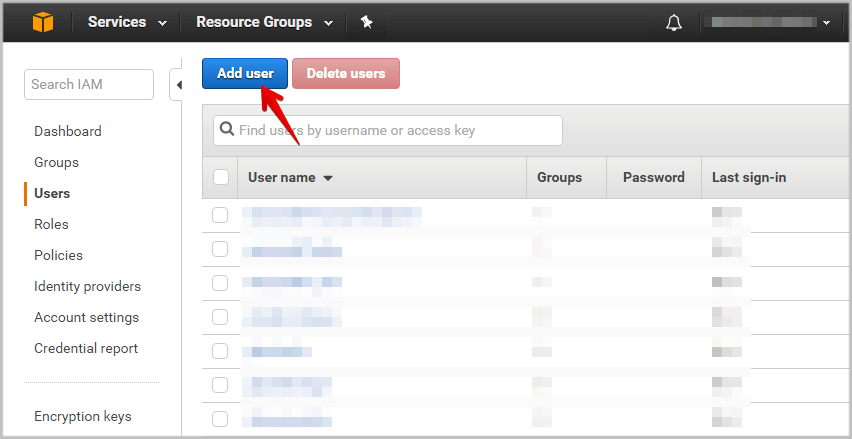
Click on “Add user”.
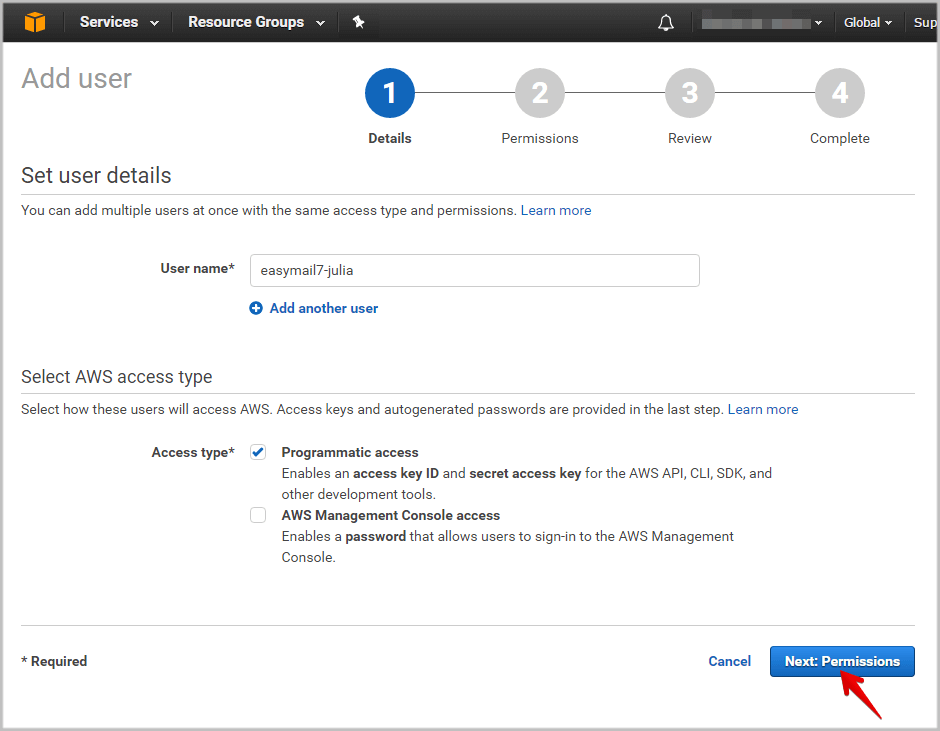
Enter a user name.
Select the access type “Programmatic access” and click “Next: Permissions”.
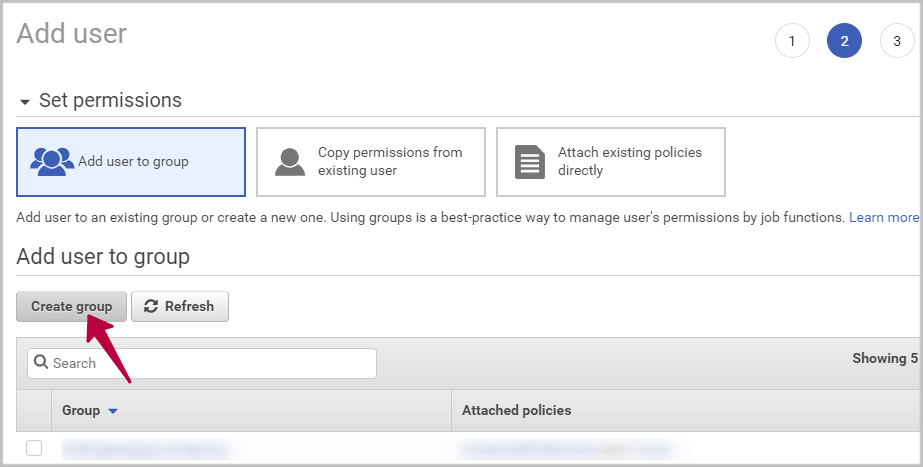
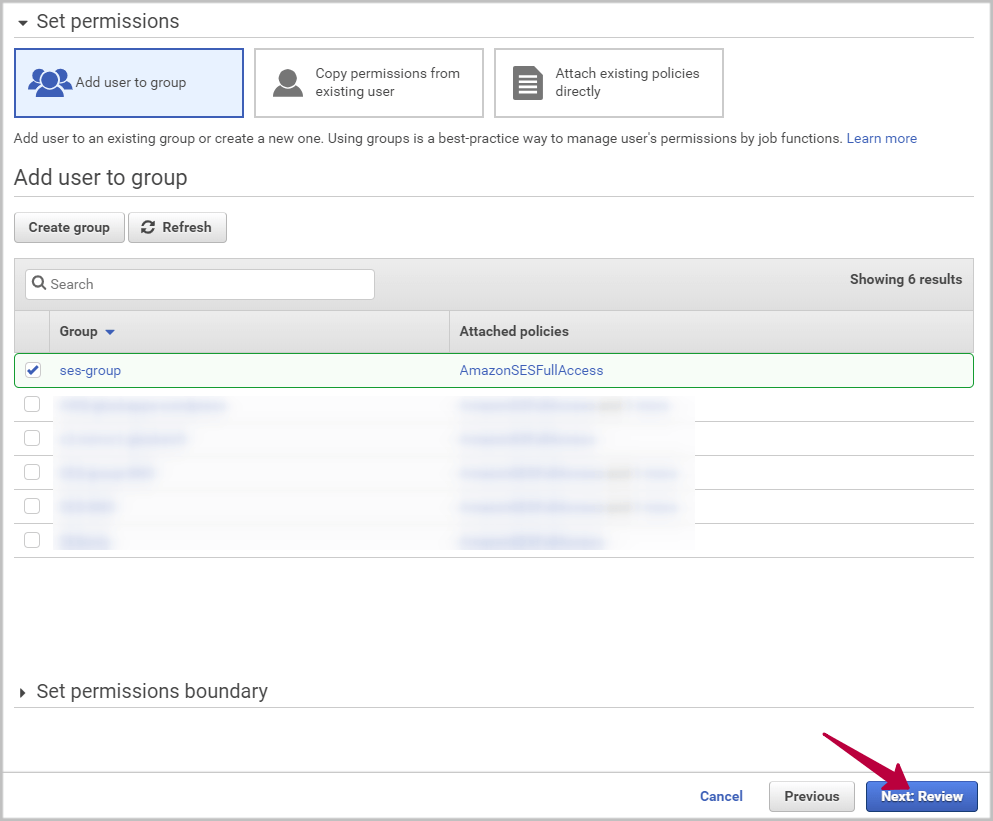
Click “Create Group”.
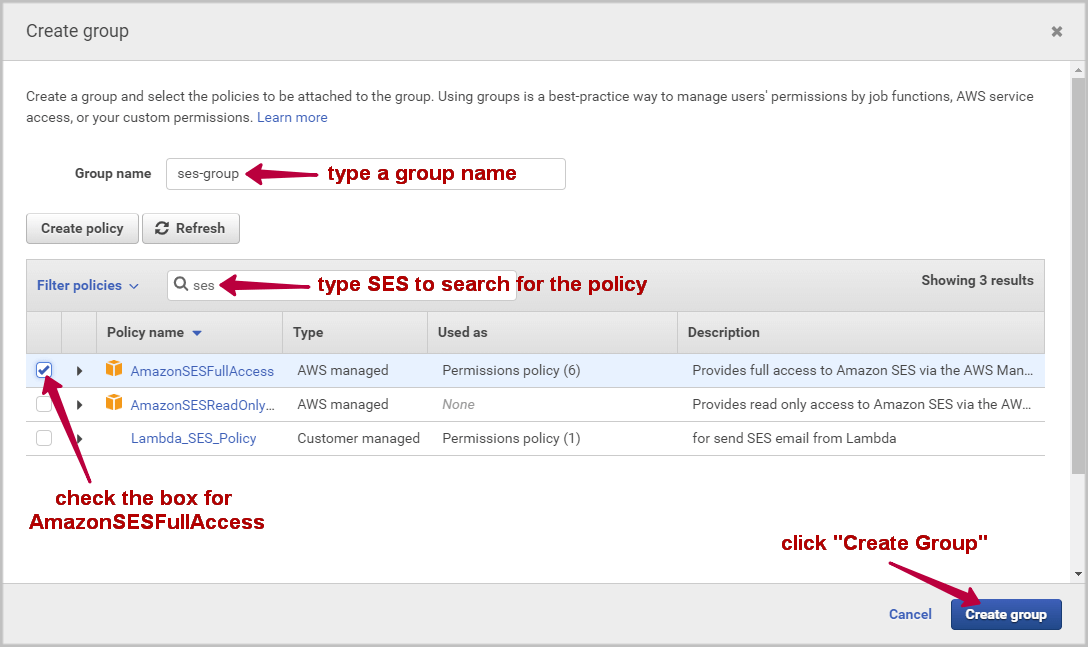
Enter a group name.
Type ‘ses’ into the search field to search for the full access policy.
Check the box next to the “AmazonSESFullAccess” policy and click “Create Group”.
Click “Next: Review”.
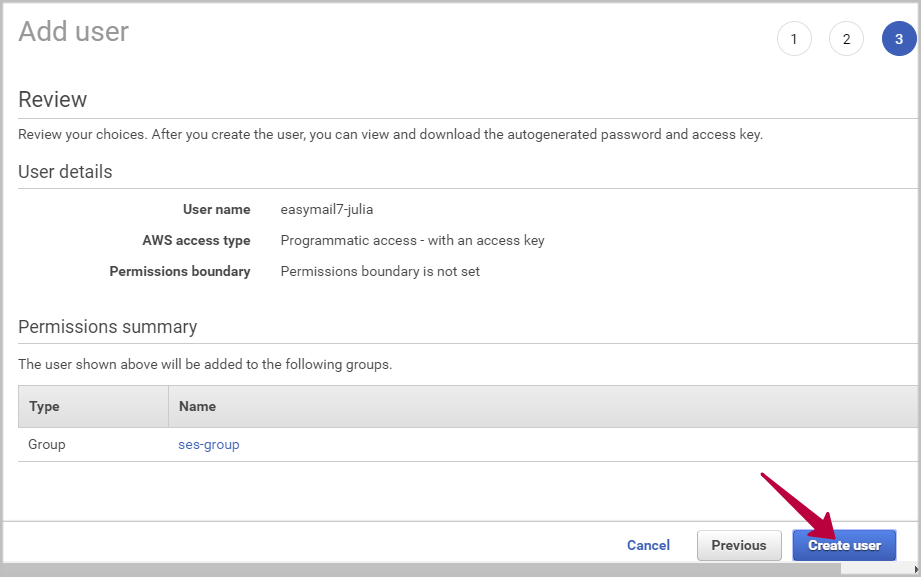
Review your choices and click “Create User”.
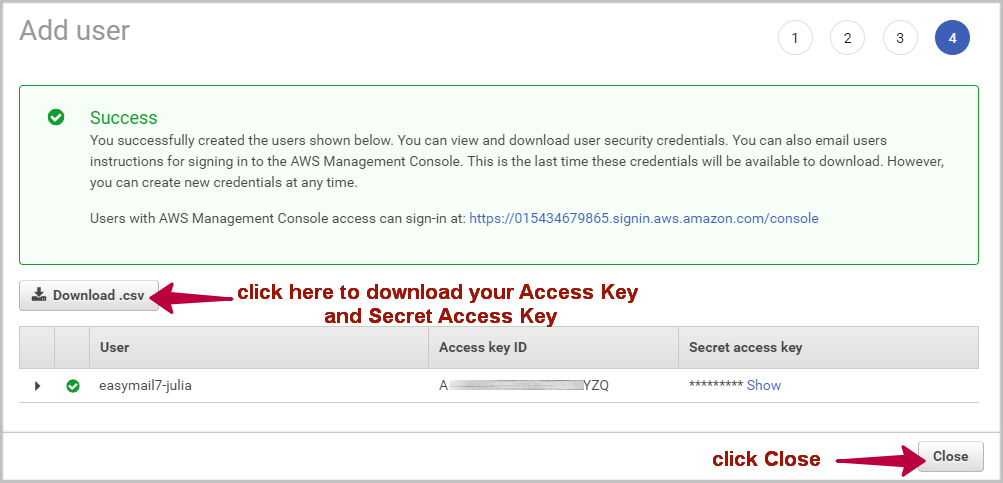
Click “Download .csv” to download your API keys (Access Key and Secret Access Key) in a file.
Then you can click “Show” to show your Secret access key and copy two keys to a file.
Click “Close”.
Now you can enter your IAM security credentials in the EasyMail7.
Step 3. Connect EasyMail7 to Amazon SES.
Open EasyMail7 and go to Settings -> Email Accounts.
Click "Add New".
Enter the sender information under the General tab.
Click on the Delivery Options tab and select the "Send via Amazon SES API" delivery option.
Open the downloaded rootkey.csv file.
Copy everything after AWSAccessKeyId= and paste it into the Access Key field.
Copy everything after AWSSecretKey= and paste it into the Secret Key field.
Click on "Verify Sender Email" button. Amazon SES will verify your From and Bounce (Return) email addresses used in G-Lock EasyMail7 Account by sending an email to those email addresses. You must click on the link in the verification email. After this, those emails will be added to your verified email list.
Now click on the "Get Identities" button to show verified email addresses and domains.
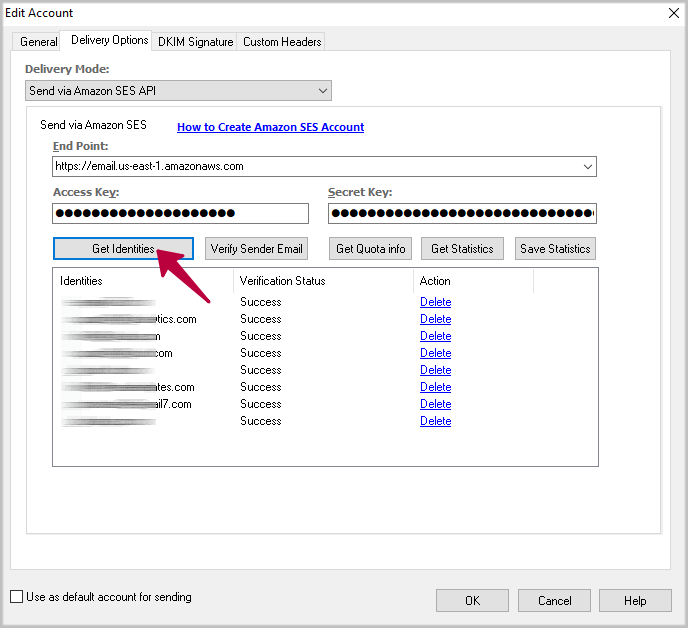
Click on the "Get Quota info" to show your quota on Amazon SES.
When you use the Amazon SES API, EasyMail7 automatically controls your sending limits to comply with your Max Send Rate on Amazon. When you reach your daily limit, EasyMail7 stops sending and automatically resumes on the next day.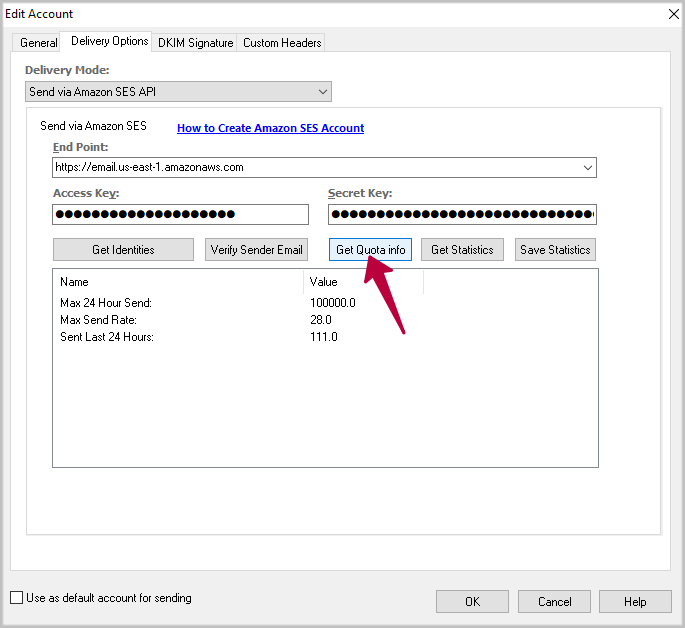
After you enter the account information in EasyMail7, click OK to create the account.
Sending Test Email.
Now you can send a test email via your Amazon SES account.
In EasyMail7, create an email, select your Amazon SES API account in the From field and click Send -> Send Test.
Enter your test email addresses into the To field or choose your test group and send a test message.
Adding DNS Record.
This step is optional but is highly recommended if you want to ensure a higher deliverability.
Under some circumstances, recipients might not receive your email if you are already publishing SPF or Sender ID records to your Domain Name Service (DNS).To ensure delivery, add the following to any of such records:
include:amazonses.com
Amazon recommends that all AWS Email Service users publish both SPF and Sender ID records to their DNS. For more information, go to the Amazon Simple Email Service Developer Guide.
SPF DNS record example: v=spf1 a mx include:amazonses.com -all
Many domain registrars provide self-service tools for administering DNS records. You can use these tools to modify your domain's DNS records, or contact your registrar for assistance.
Additional Information
Besides Amazon SES API, you can use the Amazon SES SMTP server in EasyMail7 to send bulk emails.
For a faster sending speed, you can launch an Amazon EC2 instance and use EasyMail7 on the instance. With this setup, you will be able to use subscription forms and online unsubscribe feature in EasyMail7.
One more thing:
If you need help with Amazon SES, check out these resources:
Amazon SES Email Sending Best Practices Whitepaper
Amazon SES system tracks each customer’s bounce, complaint, and content metrics in order to improve inbox delivery for all Amazon SES customers. For further details about each of these metrics and tips on how to improve them, please see the Amazon SES Email Sending Best Practices Whitepaper.
Amazon SES Getting Started Guide (provides instructions for using the service for the first time)
Support Center (the home page for AWS Technical Support, including access to Developer Forums, Technical FAQs, Service Status page, and Premium Support (if you are subscribed to this program)).
Premium Support Information (the primary web page for information about AWS Premium Support, a one-on-one, fast-response support channel to help you build and run applications on AWS Infrastructure Services).
Contact Us (a central contact point for inquiries concerning AWS billing, account, events, abuse, etc).
Conditions of Use (detailed information about copyright and trademark usage at Amazon.com and other topics).