How to Connect to MySQL Database from G-Lock EasyMail7
If you use G-Lock EasyMail7, you do not need to install MySQL Connector/ODBC and create a user DSN for MySQL driver in the ODBC Data Source Administrator.
You may only need to add the IP address of the computer where the EasyMail7 Server is installed to the "Access Hosts" section in cPanel on the remote web server where your MySQL database is located.
Then follow these quick steps:
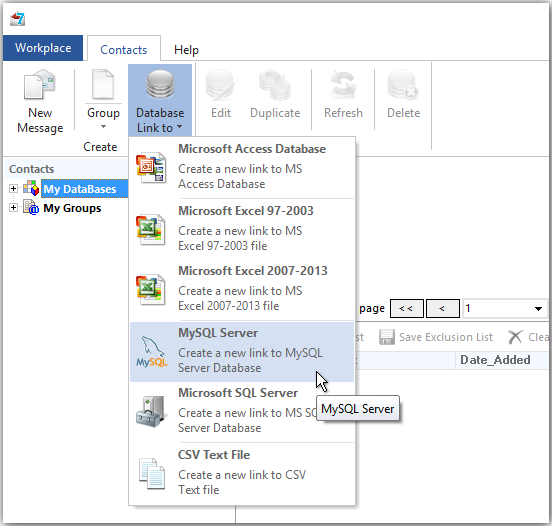
1. Open the EasyMail7 Client and go to "Contacts".
2. Click on "Database Link to" and select "MySQL Server".
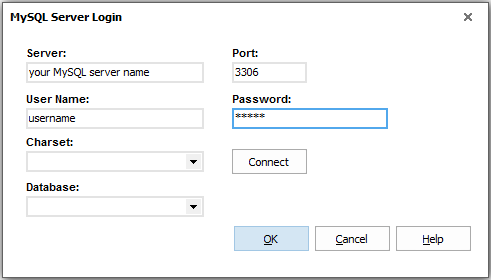
3. Enter your login information to your MySQL server.
4. Click OK.
5. Select the database table and fields you want to show in G-Lock EasyMail7.
6. Click OK.
How to Connect to MySQL Database from G-Lock EasyMail v6.xx
- For a video tutorial click here
Step 1 – Installing MyODBC Driver
- Download MySQL Connector/ODBC to your desktop computer making sure to select the appropriate installation file for your version of Windows. (Probably Windows Driver Installer (MSI))
- After downloading, double click on mysql-connector-odbc-win32.msi.
- When the MySQL Connector/ODBC – Setup Wizard window appears, click Next.
- Select the "Typical" installation & click Next.
- Click Install and wait for the installation to finish. Click Finish.
Congratulations! You have successfully installed MySQL Connector/ODBC.
Now you must allow the computer where G-Lock EasyMail is installed to access your MySQL database by adding its IP address to the list of allowed hosts for your MySQL database.
Step 2 – Adding MySQL Access Hosts
- Open your Internet browser.
- Open the cPanel on the remote web server where your MySQL database is located
- Click on MySQL Databases link
- Scroll down the page and find "Access Hosts" section
- Enter the IP address of the computer where G-Lock EasyMail 6 is installed
- Click Add Host
- Close your browser
Now you must create a user DSN for MySQL driver in the ODBC Data Source Administrator.
Step 3 – Creating User DSN for MySQL Driver
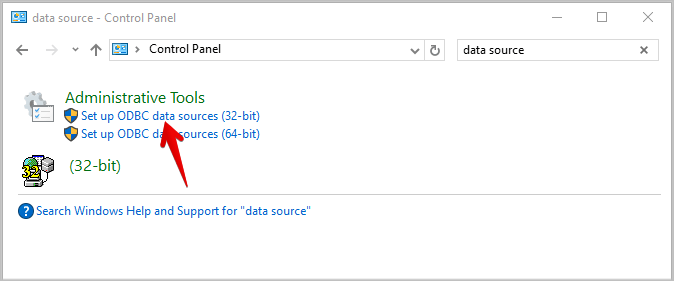
- Click Start -> Settings -> Control Panel
- Double click the mouse on Administrative Tools in the Control Panel
- Double click the mouse on Set up ODBC Data Sources (32-bit)
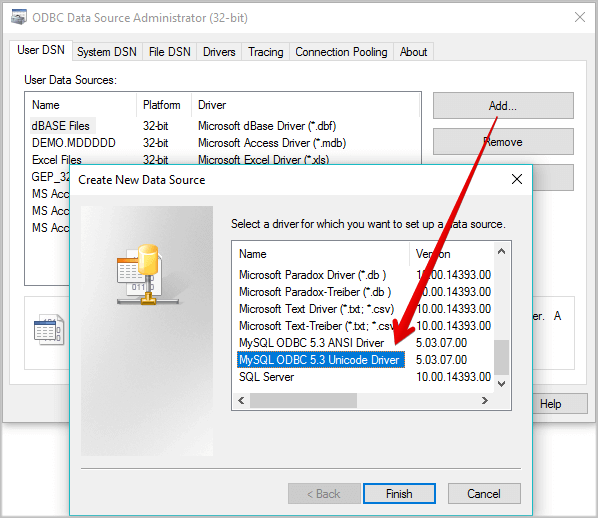
- On the “ODBC Data Source Administrator (32-bit)” screen click Add
- Select MySQL ODBC 5.x.x Unicode Driver
- Click Finish
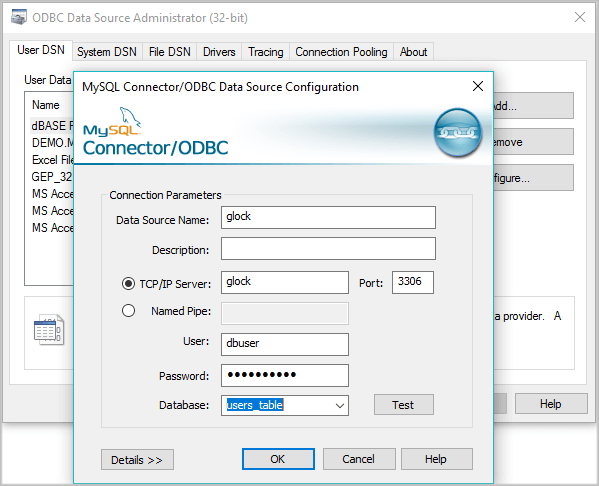
- Type Data Source Name, your TCP/IP server name, your username and password to connect to your MySQL server, and then select your MySQL database name
- Click Test
- Click OK if the test passes
- Click OK to close the Connector/ODBC screen
- Click OK to close the ODBC Data Source Administrator screen.
Now you are ready to connect to your MySQL database using G-Lock EasyMail 6.
Step 4 – Connecting to MySQL Database Using G-Lock EasyMail
- Open G-Lock EasyMail v6
- Click on the Address Book button on the toolbar.
- Click on New Link to Database icon
- Type a name for your database link
- Click Select Database button
- On the Data Link Properties screen select Microsoft OLE DB Provider for ODBC Drivers
- Click Next
- Select your data source name
- Click on Test Connection button
- Click OK if the test passes
- Click OK to close the Data Link Properties screen
- On the Database Manager screen select the Table Name from your MySQL database.
- Map the fields from your MySQL database to the respective fields in G-Lock EasyMail. To do this, click the mouse in the Mapped Field column and select a field name. The Email field is required for mapping.
- Click OK to save the settings.
Success! To see how the data from your MySQL database is displayed in G-Lock EasyMail, put the cursor on your database name in My Databases section at the left pane.