How to Connect EasyMail7 with Hundreds Webapps or CRM
Zapier integrates EasyMail7 with hundreds of best-in-breed web services. With Zapier you can easily connect EasyMail7 to other applications you use like Gmail, Google Docs, Salesforce, Shopify, Highrise, PayPal, and whole lot more.
For example, you can automatically add any “new contact” in Salesforce or any new customer from a PayPal sale to the EasyMail7 contact group. In addition, you can subscribe and unsubscribe contacts in the EasyMail7 groups through Zapier.
If you have not heard about Zapier yet, watch this introduction video about Zapier
Now let's see how to make a zap to create new contacts from people sending emails to your Gmail account through the EasyMail7 API.
Step 1. Generate API Key.
Open EasyMail7 and login.
Go to Settings -> User Settings.
Click "Connect" and login with your superadmin credentials.
Click on "Manage Workplaces".
Double click the mouse on the workplace that you want to connect to Zapier.
Click "Generate" to generate the API key.
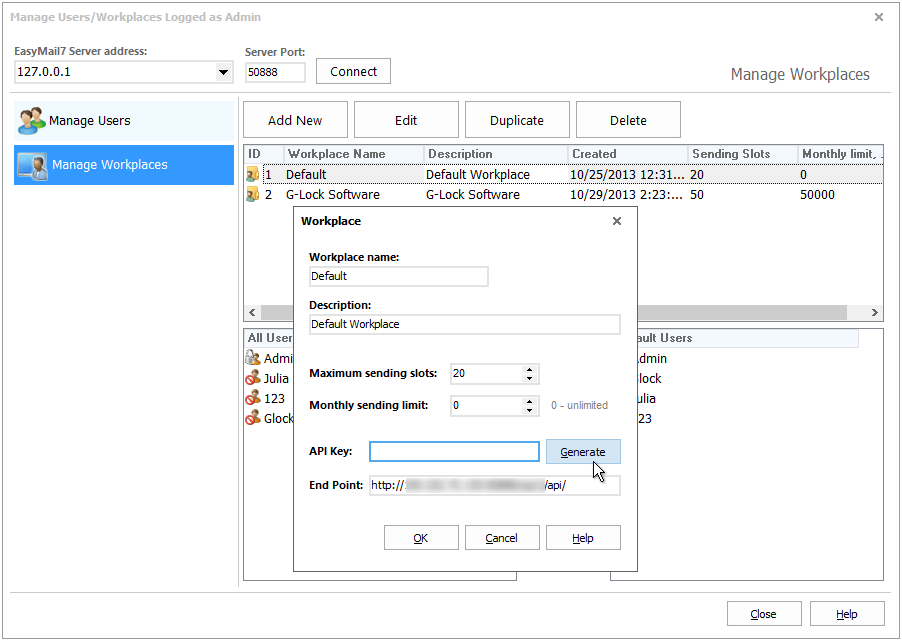
Click OK to make the program save and apply the API key.
Important! The API key and Endpoint are unique for each workplace and EasyMail7 Server.
Step 2. Make a Zap to Collect Contacts in EasyMail7.
Currently EasyMail7 works with Zapier by invitation only.
Click here and accept invite.
Create an account on Zapier if you don't have it yet or login to your dashboard.
Click "Make a Zap!" and follow the steps.
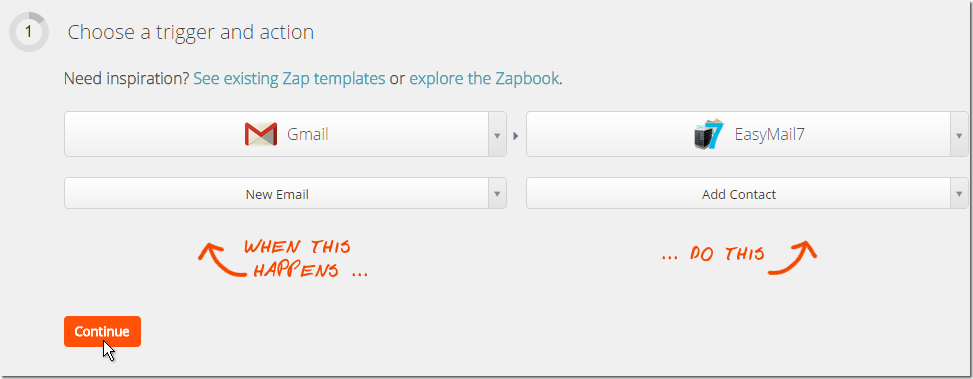
1. Choose a Trigger and Action.
Choose Gmail as the application to take contacts from.
Choose EasyMail7 as the application to add contacts to.
Choose a trigger, for example, new email and action "Add Contact".
Click "Continue".
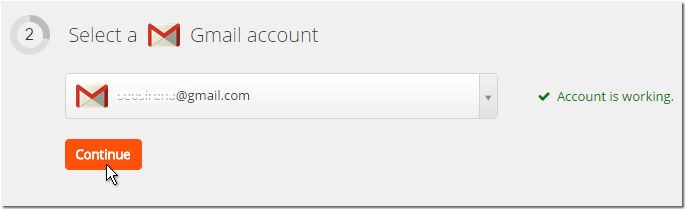
2. Select a Gmail Account.
Connect to your Gmail account, test it and click "Continue".
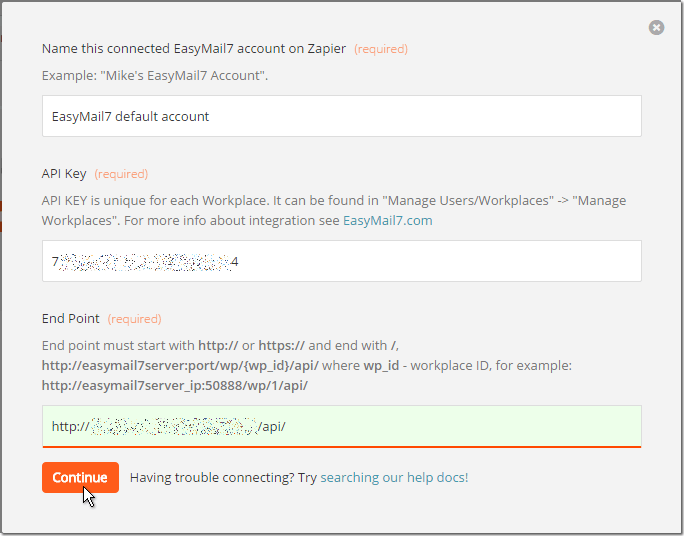
3. Select an EasyMail7 Account.
Click on "Connect an EasyMail7 Account".
Enter a name for your connected account.
Go to Workplace -> Manage Users/Workplaces in the EasyMail7, login and double click on the workplace name.
Copy the API key and paste it in Zapier.
Copy the Endpoint and paste it in Zapier.
Click "Continue".
If the account test passes, click "Continue" to go to the next step.
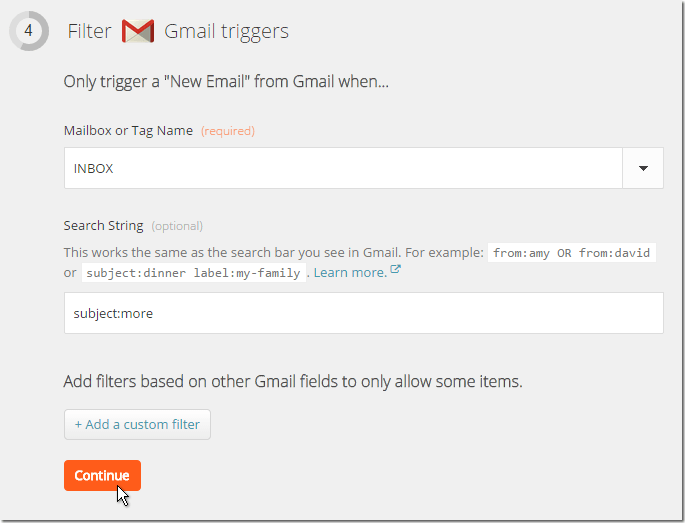
4. Set a Filter for Gmail Triggers.
Select a Gmail folder to monitor for new emails, for example Inbox.
Enter the search string if you want to generate leads from specific emails only.
Click "Continue".
5. Match Fields from Gmail Email to EasyMail7.
Select a group in the EasyMail7 (only internal groups are available) to which you want to add contacts.
Match the fields you want to take from Gmail emails and add to the group in the EasyMail7.
"Email address" and "Subscribe status" are required fields.
Click on the "Email address" field and choose "Choose an available trigger field (advanced)".
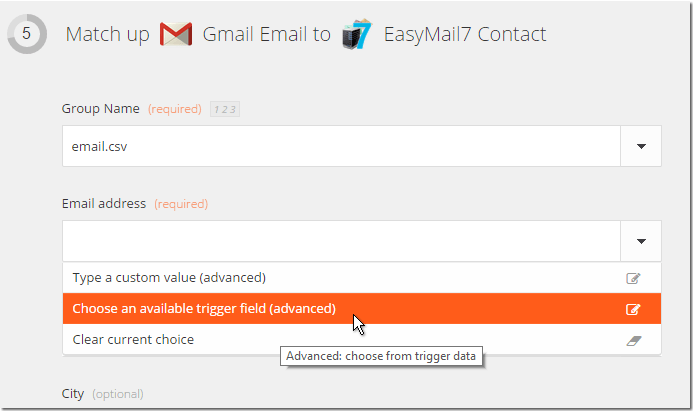
Choose "From Address" from the Gmail email fields.
Choose "subscribed 1" in the "Subscribe status" field.
To collect names, match the Recipient_Name field and choose the "From Name" from the Gmail email fields.
When done, click "Continue".
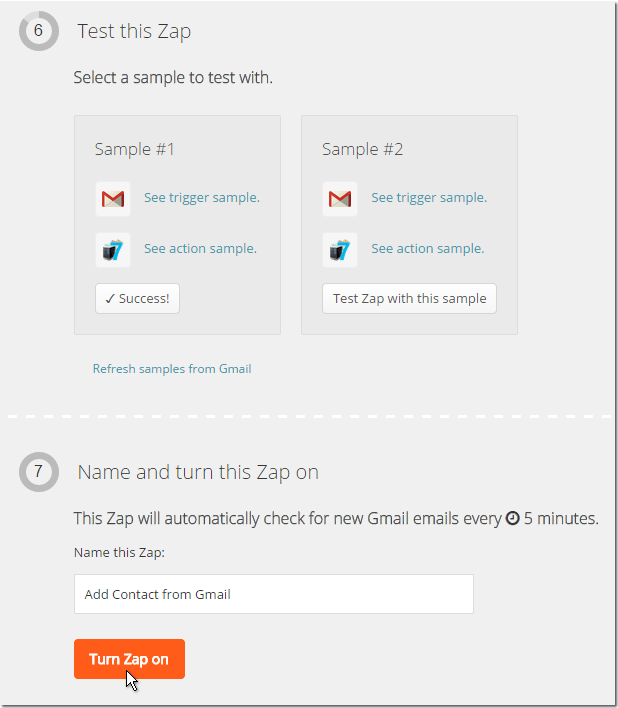
6. Test Zap.
Click on "Test Gmail trigger".
After Zap shows sample emails, click on "Test zap with this sample".
If the test is successful, go to G-Lock EasyMail7, open the group and see if the contact was added or not.
If it was added as it should, click "Continue" to go to the last step.
7. Name and Turn Zap on.
Enter a name for your zap and turn it to on.
Additional Information
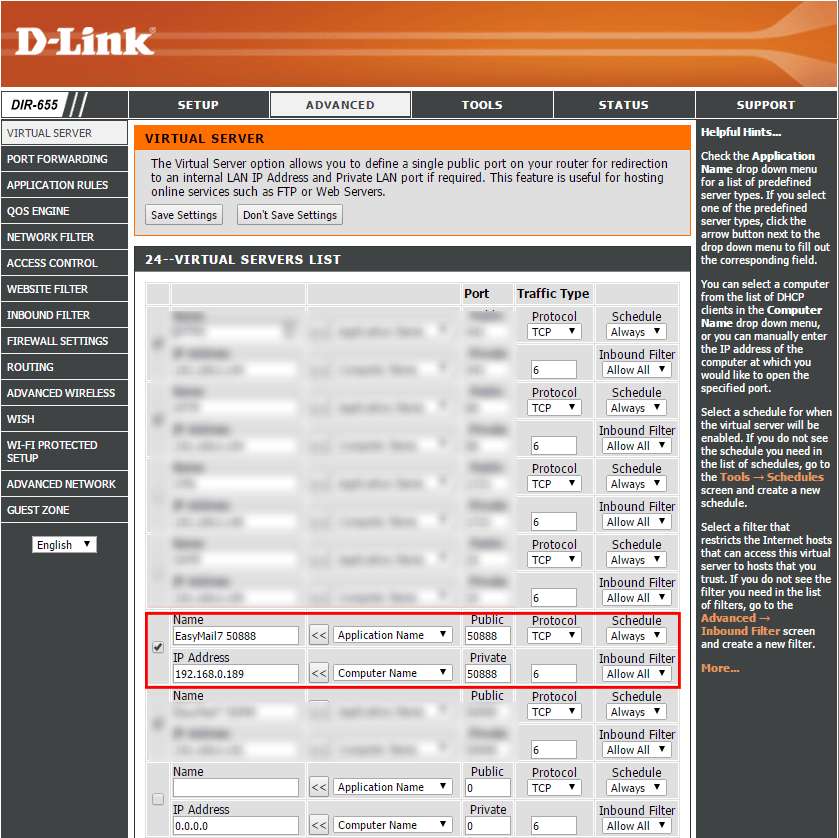
If you are behind a router and installed the EasyMail7 Server on your local computer, you must setup a Virtual Server and define the port 50888 for EasyMail7 on your router for redirection of external queries to your local IP address.