How to Use Elastic Email’s SMTP Settings in EasyMail7 to Send Email Newsletters
You can connect EasyMail7 with any SMTP server or SMTP relay service to send emails as per your requirement.
Here we guide you through the steps how to connect EasyMail7 with Elastic Email.
Step 1. Create Account with Elastic Email.
If you don’t have an account with Elastic Email yet, follow the steps below to create it.
Go to the Elastic Email’s website and click “Signup”.
Enter your email address, password, industry and click “Create”.
Then enter the captcha text and submit.
You will be sent an email with the account activation link.
Check your mailbox and click the link to activate your account on Elastic Email.
Step 2. Configure Your Elastic Email Account.
Before you can start sending emails via the Elastic Email’s SMTP, you need to do some important settings in your account.
First, you need to add and verify your sending domain with Elastic Email.
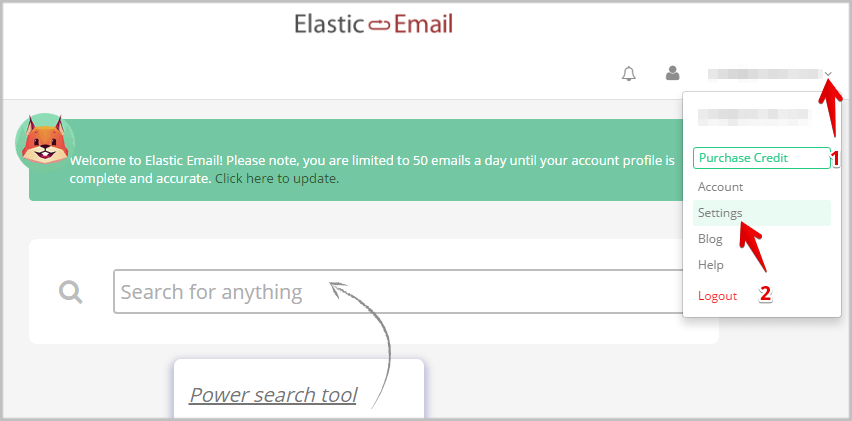
After you activate your account on Elastic Email, login to it.
Go to the account Settings.
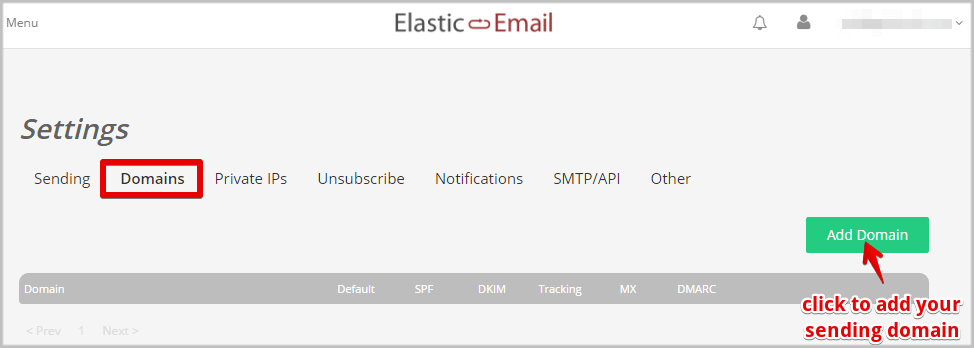
Go to “Domains”.
Click “Add Domain”.
Enter your sending domain and add it.
Then follow the guidance here to add the SPF and DKIM authentication to your sending domain.
When added, click “Verify”.
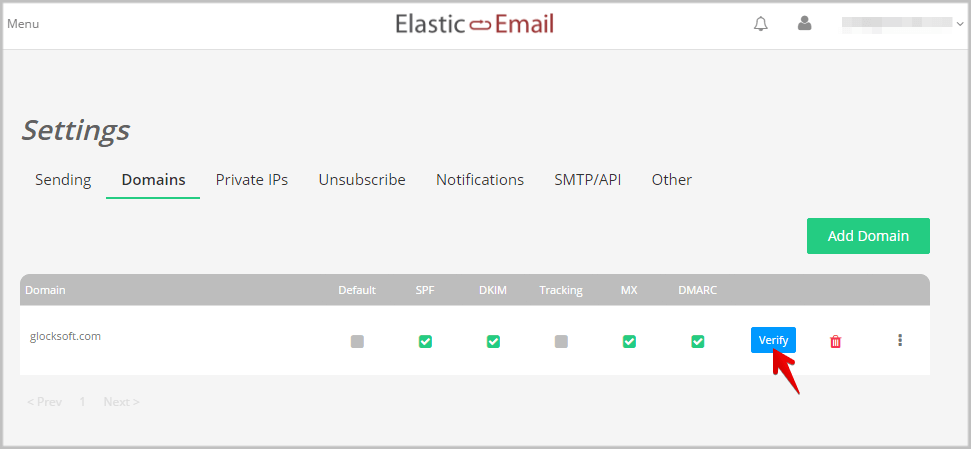
If the authentication records are added correctly, you will see the checkmarks in the appropriate boxes.
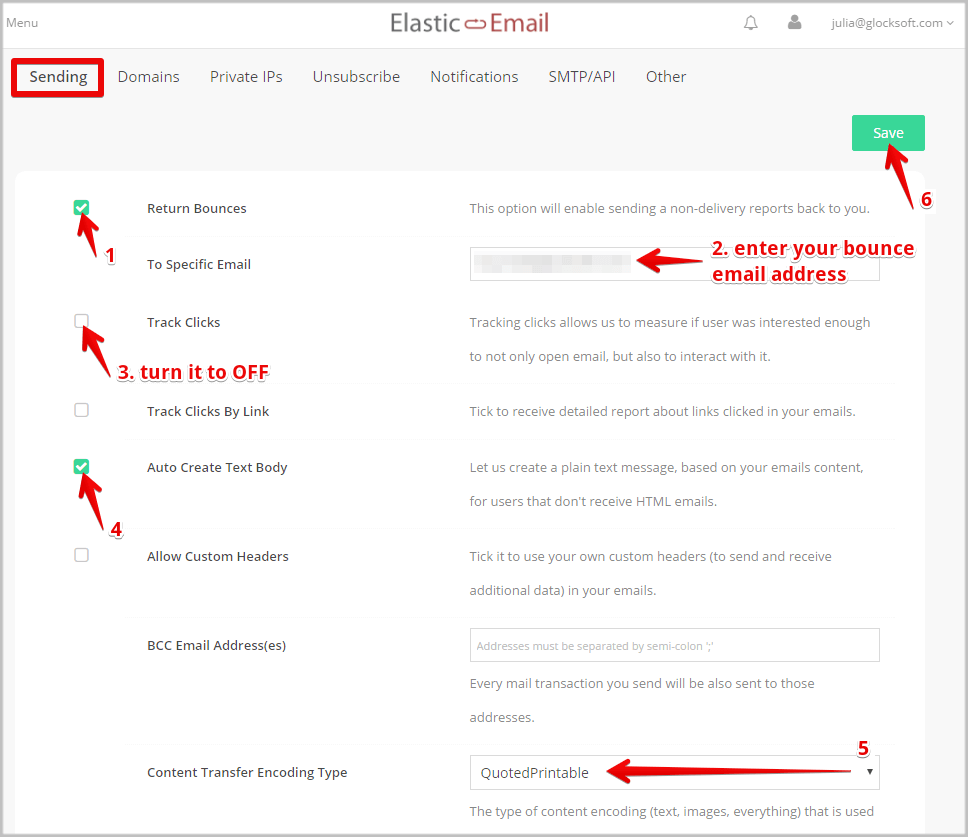
Now go to the “Sending” tab and make these settings:
1. Check the “Return Bounces” option.
2. Enter your email address destined to receive bounce emails. If you don’t have a separate email address for bounces, enter the email address that you will use to send emails from.
This setting will allow Elastic Email to forward your bounce messages to you in order you can handle them with the EasyMail7’s Bounce Handler.
3. Turn the “Track Clicks” option to Off. It is the recommended setting. Tracking links from generic domains used by email service providers and SMTP gateway services like Elastic Email often get on different blacklists because they are used by all service users.
If you want to track email opens and clicks without losing in deliverability, you can use an email tracking service like G-Lock Analytics that allows you to use a custom domain for tracking links.
4. Check the “Auto Create Text Body” option.
5. Select the “QuotedPrintable” content transfer encoding type.
6. Click “Save”.
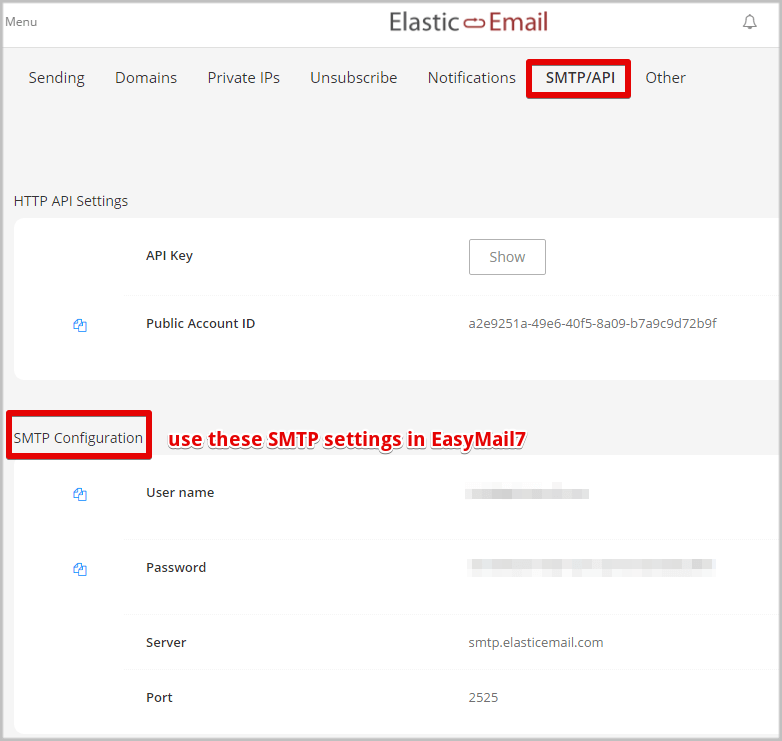
Next, go to the “SMTP/API” tab.
Notice the data in the “SMTP Configuration” section. You have to use these SMTP credentials in EasyMail7.
Step 3. Configure EasyMail7 to Use the Elastic Email’s SMTP.
Start EasyMail7 and go to Settings -> Email Accounts.
Click “Add New”.
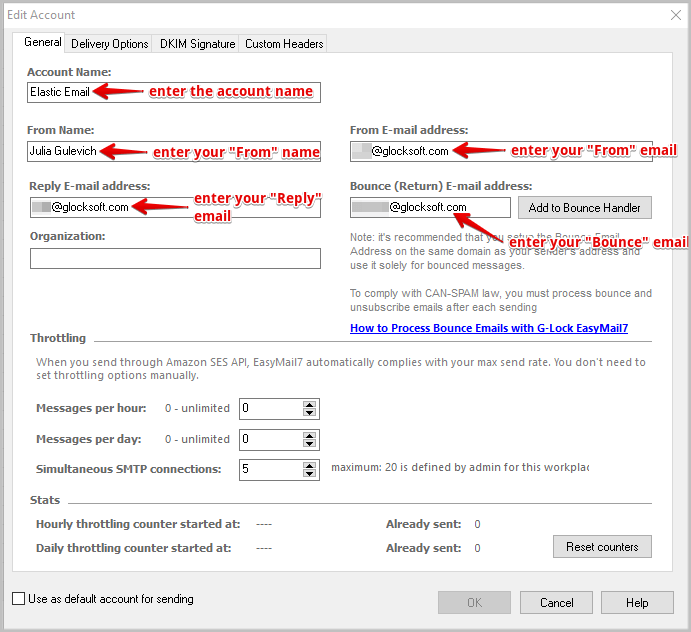
Enter the account name, “From name”, “From” email address, “Bounce (return)” email address and “Reply” email address under the General tab.
Note: as the “Bounce (return)” email address enter your bounce email address that you entered in your Elastic Email account to forward bounces to.
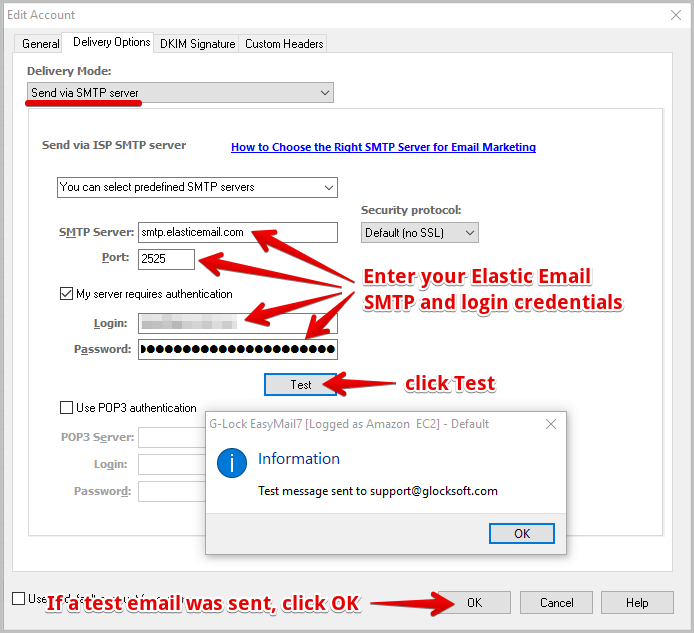
Then go to the “Delivery Options”.
Choose the “Send via SMTP Server” delivery mode and enter the SMTP credentials from Elastic Email:
SMTP server: smtp.elasticemail.com
Port: 2525
Security protocol: Default (No SSL)
My server requires authentication: Yes
Login: your User name from the SMTP Configuration settings on Elastic Email
Password: your password from the SMTP Configuration settings on Elastic Email
Click “Test” to test the SMTP settings.
If you receive a test email from EasyMail7, everything is good and you are done. If not, double check if your settings are correct.
Click OK to save the account settings in EasyMail7.
Step 3. Configure Bounce Handling in EasyMail7.
There is one more important thing you need to do — configure bounce handling to suppress bounced email addresses from your mailing list and maintain a good sender reputation.
You’ve already set up the forwarding of bounce messages to your bounce email address in Elastic Email.
Now you need to set up bounce handling in EasyMail:
Follow these steps:
Return to the main EasyMail7 window.
Click on “Bounce Handler” at the left pane.
Create an account in the Bounce Handler with your incoming mail server settings.
Note: in the Login field, enter your “Bounce” email address to which your bounce email messages will be forwarded by Elastic Email.
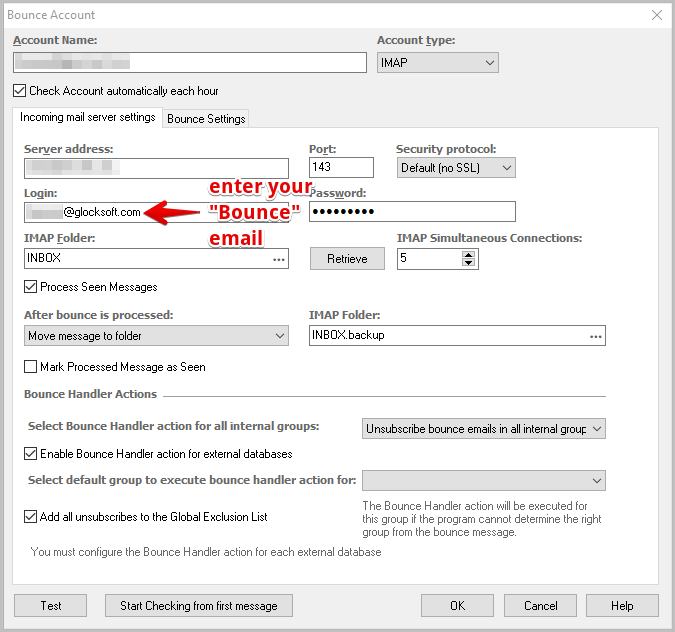
Also, set other actions and options that will be applied to bounced emails and click OK to save the account.
Now you can manually start the account check in the Bounce Handler after each broadcast to get your bounced emails handled and deleted/unsubscribed in your contact groups. Or, you can then go to the bounced account settings and check the option to automatically check your account and process bounces every hour.
Here you can read more about bounce handling in EasyMail7